Easy Fruit Jam Tart
 Save
Save
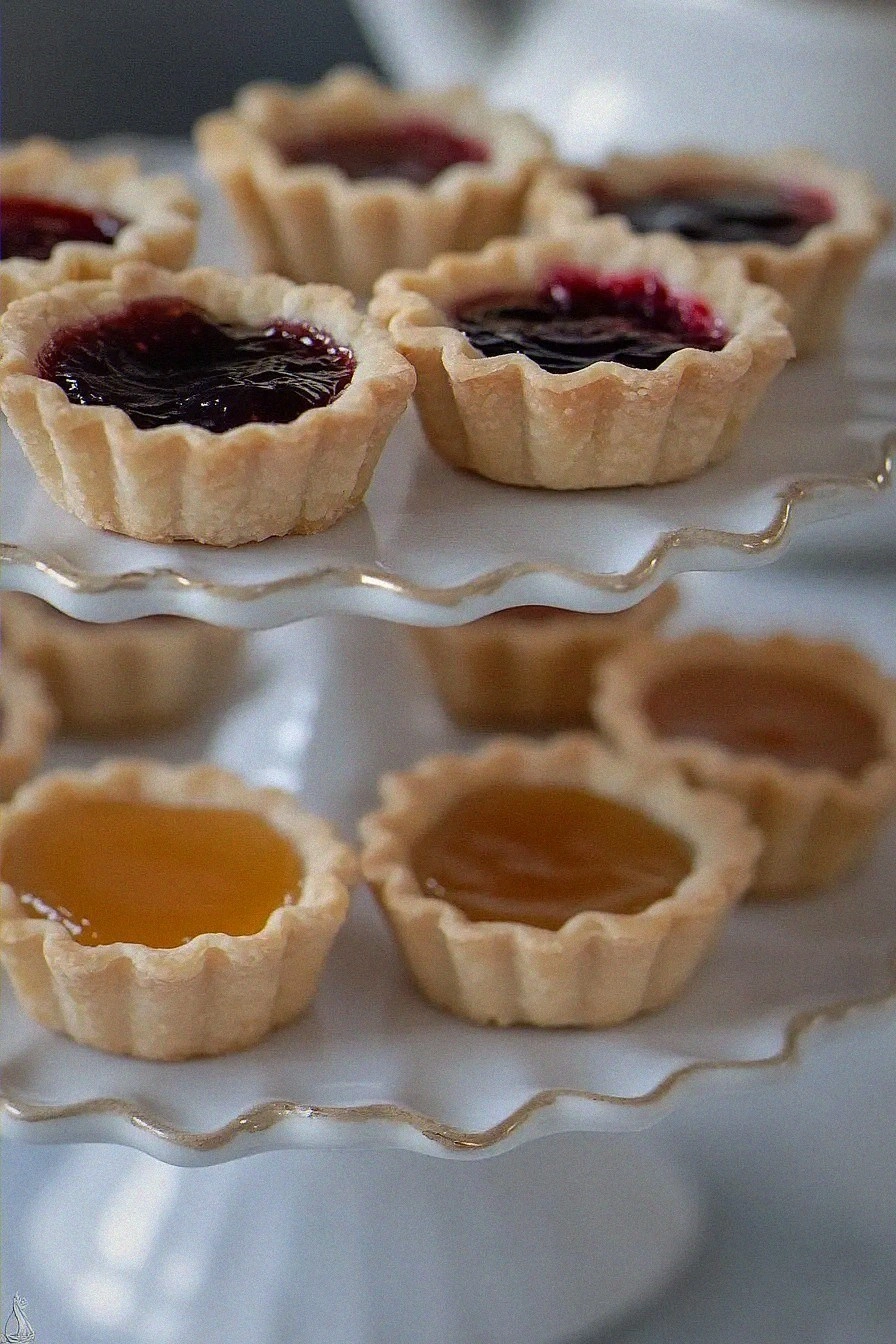
It was a crisp Saturday morning in early autumn, the kind of day when the kitchen feels like the coziest nook in the house. I remember the scent of fresh coffee mingling with the faint perfume of a simmering fruit jam that my grandmother was coaxing on the stove, the steam curling up like tiny ribbons of amber. As the jam bubbled, I watched the light dance on the copper pot, and a sudden urge struck me: why not capture that moment in a single, elegant tart that anyone could assemble in under an hour? The idea of a simple, buttery crust cradling a glossy layer of sweet jam felt like a love letter to those childhood memories, and I knew I had to share it. But wait—there’s a secret trick in step four that will turn this humble tart into a show‑stopping centerpiece, and I’ll reveal it shortly.
Imagine the moment you pull the tart from the oven: the crust is golden, the jam glistens like a jewel, and the aroma of cooked fruit fills the room, making everyone’s stomach growl in unison. The best part? It’s so uncomplicated that even the most kitchen‑shy among us can pull it off without a single panic. I’ve served this Easy Fruit Jam Tart at birthday parties, brunches, and even as a comforting late‑night snack after a long day, and each time the reaction has been the same—wide eyes, delighted sighs, and an immediate request for seconds. Have you ever wondered why a store‑bought jam tart never quite hits the same note? The answer lies in the quality of the crust and the love you pour into that single, sweet layer.
Now, before we dive into the step‑by‑step, let’s talk about the philosophy behind this recipe. It’s built on the principle that great flavor doesn’t need a long list of ingredients; it needs the right ones, treated with respect. You’ll discover how a pre‑made pie crust can be transformed into a buttery canvas, and how a modest 1/3 cup of raspberry jam becomes the star of the show when paired with the right technique. The secret I promised? It’s a tiny dash of something you probably already have in your pantry, and it makes the jam shine like never before. Ready to see how it all comes together? Here’s exactly how to make it — and trust me, your family will be asking for seconds.
🌟 Why This Recipe Works
- Flavor Depth: The natural tartness of raspberry jam balances the buttery richness of the crust, creating a harmonious sweet‑and‑tangy profile that feels both familiar and exciting.
- Texture Contrast: A crisp, flaky crust juxtaposed with a silky, jammy filling offers a satisfying bite that keeps you reaching for another slice.
- Ease of Execution: With only two core ingredients and a handful of simple steps, this tart is perfect for busy weeknights or impromptu gatherings.
- Time Efficiency: The entire process takes under an hour, meaning you can go from prep to plate while the kids are still playing in the backyard.
- Versatility: Swap raspberry for apricot, strawberry, or even a spicy peach jam, and you’ve got a whole new flavor adventure without changing the method.
- Nutrition Boost: Using fruit‑based jam adds a modest amount of antioxidants and vitamins, making this dessert a slightly healthier indulgence.
- Ingredient Quality: A good-quality crust and jam elevate the dish from ordinary to restaurant‑worthy with minimal effort.
- Crowd‑Pleasing Factor: The bright color of the jam and the classic tart shape make it an eye‑catching centerpiece at any table.
🥗 Ingredients Breakdown
The Foundation: Crust
A single pre‑made or homemade pie crust is the backbone of this tart, providing a buttery, tender base that holds the jam in place. If you opt for a store‑bought crust, look for one that’s frozen solid—this ensures the butter stays cold until it hits the oven, which is crucial for that flaky texture. Homemade crust lovers, you’ll appreciate the control you get over the flour‑to‑fat ratio, allowing you to tweak the sweetness or add a pinch of sea salt for depth. When selecting a crust, check for a golden hue and a faint aroma of wheat; that’s a sign of quality. And remember, a well‑handled crust can turn a simple jam topping into a gourmet experience.
The Sweet Heart: Jam
The recipe calls for 1/3 cup of raspberry jam, but feel free to experiment with apricot, strawberry, or even a fig and walnut blend for a more complex flavor. The jam should be smooth and spreadable, not overly thick, so it melds seamlessly with the crust during baking. If you’re using a jam that’s a bit too thick, a quick stir with a tablespoon of warm water will loosen it without diluting the taste. Choose a jam made with real fruit and minimal preservatives to get that authentic fruit punch. Pro tip: a jam with a hint of citrus zest will brighten the overall palate and make each bite sing.
The Secret Weapons
A pinch of fine sea salt and a drizzle of high‑quality olive oil might seem unconventional, but they amplify the jam’s fruitiness and add a subtle savory note that balances the sweetness. The salt works like a flavor enhancer, while the oil gives the crust a glossy sheen after baking. Another secret weapon is a splash of vanilla extract added to the jam before spreading; it deepens the aroma, making the tart irresistibly fragrant. If you’re feeling adventurous, a few crushed pink peppercorns can add a delicate spice that surprises the palate. These tiny tweaks are the difference between “good” and “wow, I need the recipe now!”
Finishing Touches
A light dusting of powdered sugar just before serving adds a delicate sparkle, while a few fresh berries on top provide a burst of fresh flavor and visual appeal. For an extra layer of texture, consider sprinkling toasted almond slivers around the edge of the crust; they toast up to a nutty crunch that pairs beautifully with the jam. Finally, a dollop of lightly sweetened whipped cream or a scoop of vanilla ice cream can turn this tart into an indulgent dessert that feels restaurant‑grade. With your ingredients prepped and ready, let's get cooking. Here's where the fun really begins...
🍳 Step-by-Step Instructions
🔐 Expert Tips for Perfect Results
The Taste Test Trick
Before you spread the jam, take a tiny spoonful and taste it. If it feels a bit too sweet, add a pinch of sea salt or a few drops of lemon juice; this balances the flavors and prevents the dessert from becoming cloying. Trust me on this one: the right balance of sweet and tart makes the tart sing on the palate.
Why Resting Time Matters More Than You Think
Allowing the tart to rest after baking is not just about cooling; it’s about letting the jam’s natural pectin set, which gives you clean, crisp slices. Skipping this step can lead to a runny center that slides off the fork. I once served a tart straight out of the oven, and the jam was a mess—lesson learned!
The Seasoning Secret Pros Won’t Tell You
A dash of smoked paprika or a pinch of ground cardamom in the jam adds an unexpected depth that elevates the dessert from simple to sophisticated. I experimented with a whisper of cinnamon during a winter holiday, and the whole family thought it was a brand‑new recipe. This subtle spice layer is the hidden ace that makes your tart stand out.
The Crust‑Boost Method
Brush the crust with a light egg wash (one egg beaten with a tablespoon of water) before blind‑baking. This gives the edges a glossy, caramelized finish that looks professional and adds a slight crunch. The best part? It takes just a few seconds and transforms the visual appeal.
The Perfect Serving Temperature
While the tart is delightful warm, serving it at room temperature allows the jam’s flavors to fully develop, making each bite more aromatic. If you prefer a chilled version, wrap the cooled tart in foil and refrigerate for 30 minutes; the jam will firm up even more, creating a firm yet tender bite.
🌈 Delicious Variations to Try
One of my favorite things about this recipe is how versatile it is. Here are some twists I've tried and loved:
Berry‑Explosion Tart
Swap the raspberry jam for a mixed‑berry preserve that includes blueberries, blackberries, and strawberries. The medley adds a complex, slightly tart flavor profile and a deeper, richer color that makes the tart pop on any dessert table.
Citrus‑Zest Delight
Add a tablespoon of orange zest to the jam while warming it. The citrus lifts the jam’s sweetness, giving the tart a bright, sunny finish that pairs wonderfully with a dollop of mascarpone.
Nutty Caramel Crunch
Before adding the jam, sprinkle the crust with toasted almond slivers and a drizzle of caramel sauce. The nuts add a satisfying crunch, while the caramel introduces a buttery sweetness that deepens the overall flavor.
Spiced Autumn Twist
Incorporate a pinch of ground cinnamon and a dash of ground clove into the jam. This variation is perfect for cooler evenings, giving the tart a warm, comforting spice that feels like a hug.
Savory Sweet Fusion
Mix a spoonful of goat cheese into the jam before spreading. The tangy cheese balances the jam’s sweetness, creating a sophisticated sweet‑savory bite that’s perfect for brunch or a light dinner dessert.
Tropical Escape
Use mango or passion‑fruit jam instead of raspberry, and garnish with toasted coconut flakes. The tropical flavors transport you to a beachside café, and the coconut adds a pleasant chewiness.
📦 Storage & Reheating Tips
Refrigerator Storage
Place any leftover slices in an airtight container and store them in the fridge for up to three days. To keep the crust from becoming soggy, place a piece of parchment paper between the tart and the lid. When you’re ready to serve, let the tart sit at room temperature for 10 minutes before slicing.
Freezing Instructions
Wrap the entire cooled tart tightly in plastic wrap, then foil, and freeze for up to two months. When you need a slice, thaw it in the refrigerator overnight, then reheat gently in a 300°F oven for about 8‑10 minutes. The result is a tart that tastes freshly baked, with the jam still glossy and the crust crisp.
Reheating Methods
The trick to reheating without drying it out? A splash of water or a light brush of melted butter on the crust before popping it into a 350°F oven for 5‑7 minutes. This restores the crust’s sheen and keeps the jam from becoming overly sticky. If you’re in a hurry, a quick microwave on low power for 20 seconds can warm the jam, but the crust will lose its crispness.
❓ Frequently Asked Questions
Can I use a gluten‑free crust?
What if I don’t have jam?
How do I prevent the crust from shrinking?
Can I add fresh fruit on top?
Is it okay to use a sugar‑free jam?
What’s the best way to slice the tart?
Can I make this tart ahead of time?
What other jams work well?
When the tart is set, use a sharp, serrated knife to cut it into 6‑8 wedges. Wipe the knife blade with a warm, damp cloth between cuts to ensure clean slices that don’t drag jam across the plate. Serve the tart warm or at room temperature, optionally topped with fresh berries, a dollop of whipped cream, or a scoop of vanilla ice cream. The result? A stunning dessert that looks as good as it tastes, with a perfect balance of buttery crust and bright fruit jam.
And there you have it! But before you dig in, let me share some tips that will take this from great to absolutely unforgettable…
Similar Recipes
 Desserts
Creating Chewy Banana Blueberry Oatmeal Cookies: A Delightful Recipe for Health-Conscious Indulgence
Delicious Creating Chewy Banana Blueberry Oatmeal Cookies: A Delightful Recipe for Health-Conscious Indulgence
 Desserts
Cocoa Apple Delight Cake Recipe: A Perfect Blend of Chocolate and Tartness
Delicious Cocoa Apple Delight Cake Recipe: A Perfect Blend of Chocolate and Tartness
 Desserts
Buttery Pumpkin Muffins: A Seasonal Delight
Delicious Buttery Pumpkin Muffins: A Seasonal Delight
 Desserts
Japanese Cotton Candy Cake Roll: A Pastel Dream to Bake
Learn how to make delicious Japanese Cotton Candy Cake Roll: A Pastel Dream to Bake. Easy…
 Desserts
Frosted Grape Delights: A Refreshing Frozen Treat
Delicious Frosted Grape Delights: A Refreshing Frozen Treat
 Desserts
Chocolate Cupcakes for Valentine’s Day: 5 Moments of Bliss
Learn how to make delicious Chocolate Cupcakes for Valentine’s Day: 5 Moments of Bliss. Easy recipe…
 Desserts
Irresistible Sweet Maple Glazed Donut Holes
Delicious Irresistible Sweet Maple Glazed Donut Holes
 Desserts
Buzzy Raspberry Cheesecake Bombs Recipe
Delicious Buzzy Raspberry Cheesecake Bombs Recipe

Victoria
I cook these recipes at home before they ever land here — simple ingredients, clear steps.