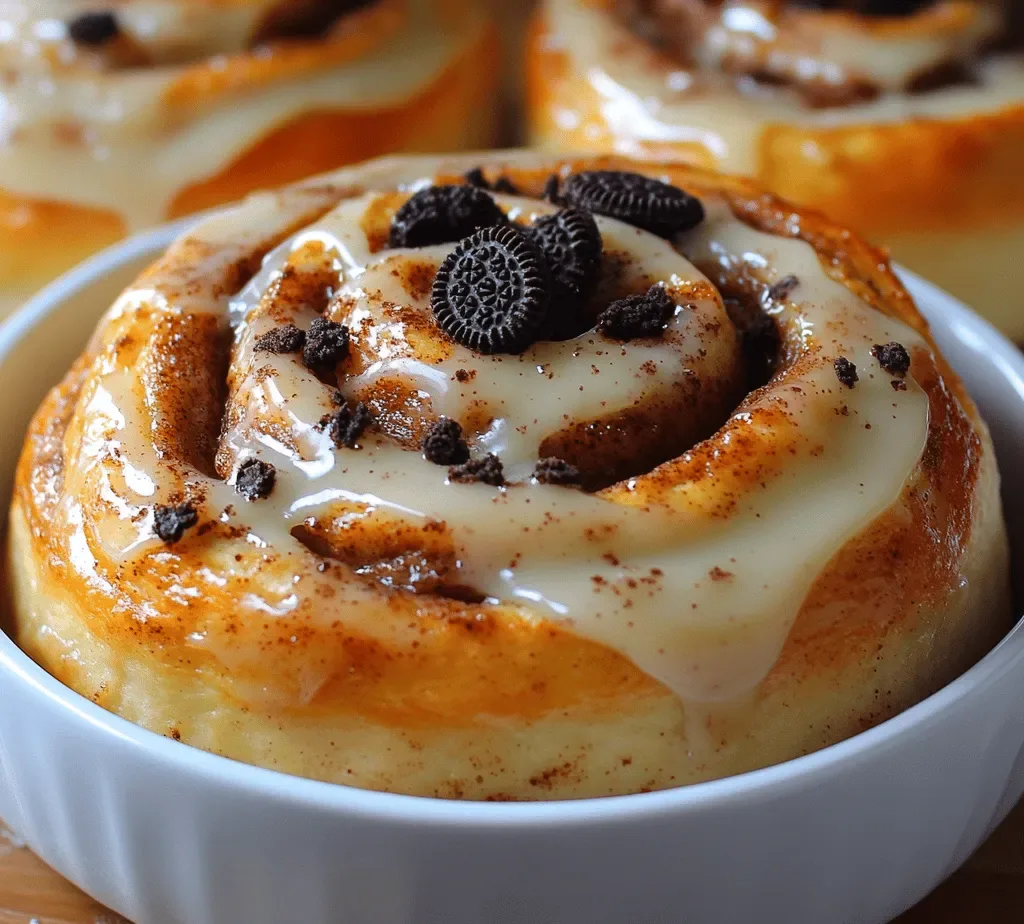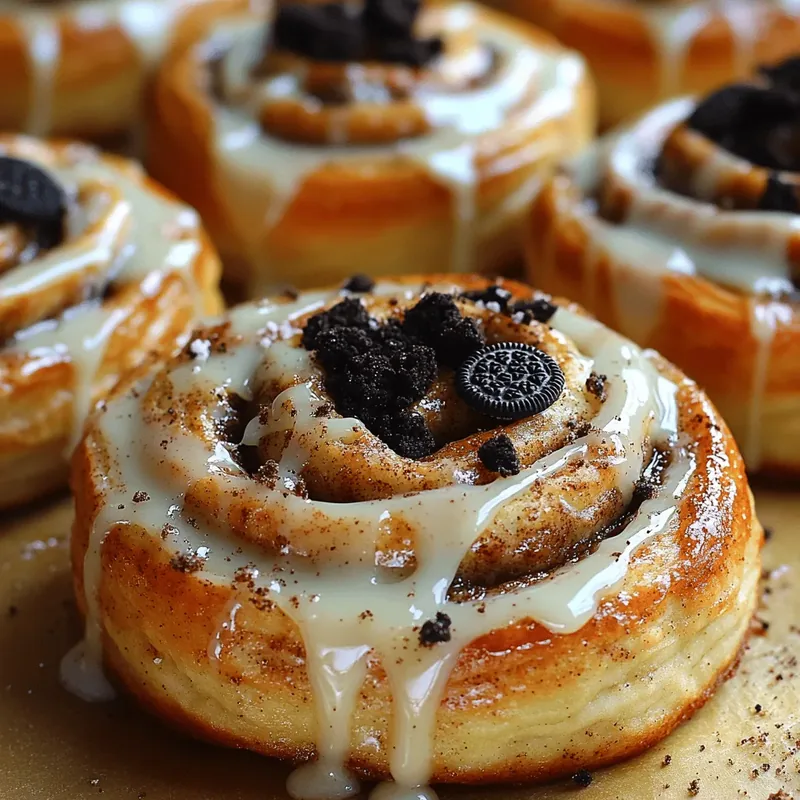
Imagine the classic comfort of a cinnamon roll meeting the indulgent, creamy crunch of Oreo cookies. This mash‑up delivers a soft, buttery swirl that’s studded with crushed Oreos and finished with a luscious cookies‑and‑cream glaze. It’s a dessert that feels both familiar and wildly inventive, perfect for turning an ordinary brunch into a celebration.
What makes this recipe truly special is the way the Oreo crumbs are folded into the dough, creating pockets of chocolate‑vanilla surprise in every bite. The glaze, a silky blend of cream cheese, powdered sugar, and a splash of vanilla, amplifies the cookie flavor while keeping the roll moist and tender.
This treat will win over cookie lovers, cinnamon‑roll addicts, and anyone who craves a sweet twist on a breakfast classic. Serve it for a weekend brunch, a holiday breakfast buffet, or even as an after‑dinner indulgence with a cup of coffee.
The process starts with a basic yeasted dough, then moves to a quick mix‑in of crushed Oreos. After a brief rise, the dough is rolled, spread with a cinnamon‑sugar‑Oreo filling, sliced, and baked until golden. A final drizzle of cookies‑and‑cream frosting brings everything together.
Why You'll Love This Recipe
Irresistible Flavor Fusion: The buttery cinnamon roll base pairs perfectly with the crunchy, chocolatey notes of Oreo crumbs, delivering a balanced sweet‑and‑spicy experience that keeps you reaching for more.
Simple Yet Show‑Stopping: Despite its impressive appearance, the recipe uses everyday pantry staples and requires only one rise, making it accessible for bakers of any skill level.
Customizable Frosting: The cream‑cheese glaze can be tweaked with extra cocoa, espresso, or even a hint of caramel, allowing you to tailor the finish to your personal taste.
Great for Gatherings: Twelve generous rolls feed a crowd, and the striking Oreo specks make the platter look as festive as it tastes, ideal for brunches, parties, or holiday tables.
Ingredients
For these Oreo Cookies and Cream Cinnamon Rolls, the foundation is a classic yeasted dough enriched with butter and milk. The magic comes from the Oreo‑infused filling and the silky cream‑cheese glaze that ties everything together. Each component is measured to ensure the rolls rise beautifully while staying tender and flavorful.
Dough (Main Ingredients)
- 2 ¼ teaspoons (1 packet) active dry yeast
- ½ cup warm whole milk (110°F/43°C)
- ¼ cup granulated sugar
- ¼ cup unsalted butter, melted
- 1 large egg, room temperature
- 3 ½ cups all‑purpose flour, plus extra for dusting
- ½ teaspoon salt
Oreo Filling
- 12 Oreo cookies, finely crushed
- ¼ cup unsalted butter, softened
- ¼ cup brown sugar, packed
- 2 teaspoons ground cinnamon
Cookies‑and‑Cream Frosting
- 4 oz cream cheese, softened
- ¼ cup unsalted butter, softened
- 1 ½ cups powdered sugar, sifted
- ½ teaspoon vanilla extract
- 2 tablespoons crushed Oreo cookies (for garnish)
The warm milk and yeast give the dough its lift, while butter and egg add richness and tenderness. Crushed Oreos in the filling introduce a delightful crunch that contrasts with the soft swirl of cinnamon sugar. The frosting’s cream cheese base provides a tangy balance to the sweetness, and the extra Oreo crumbs on top add visual appeal and an extra burst of flavor. Together, these ingredients create a harmonious, indulgent pastry that’s perfect for any celebration.
Step-by-Step Instructions
Preparing the Dough
In a small bowl, combine 2 ¼ teaspoons active dry yeast with the warm milk and a pinch of sugar. Let it sit for 5‑7 minutes until frothy, indicating the yeast is alive. Meanwhile, whisk together the remaining sugar, melted butter, egg, and salt in a large mixing bowl. Add the flour, then pour in the yeast mixture. Knead on medium speed for 6‑8 minutes, or by hand for 10 minutes, until the dough is smooth, elastic, and pulls away from the sides. Cover with a clean towel and let rise in a warm spot for 1 hour, or until doubled in size.
Rolling, Filling, and Shaping
- Flatten the Dough. Punch down the risen dough and turn it onto a lightly floured surface. Roll it into a rectangle about 12 × 16 inches thick, aiming for an even thickness of roughly ¼‑inch.
- Make the Oreo Filling. In a medium bowl, cream together ¼ cup softened butter, ¼ cup brown sugar, and 2 teaspoons cinnamon until light and fluffy. Fold in the 12 crushed Oreo cookies until evenly distributed.
- Spread the Filling. Evenly coat the rolled‑out dough with the Oreo‑cinnamon mixture, leaving a ½‑inch border around the edges to prevent leaking during the roll.
- Roll and Slice. Starting from the long side, tightly roll the dough into a log. Using a sharp, lightly floured knife, cut the log into 12 equal pieces, each about 1‑inch thick.
- Second Rise. Place the rolls seam‑side down in a greased 9 × 13‑inch baking dish. Cover loosely with foil and let them rise for an additional 30 minutes; they should puff up noticeably.
Baking and Finishing
Preheat the oven to 350°F (175°C). Bake the risen rolls for 20‑25 minutes, or until the tops are golden brown and a toothpick inserted near the center comes out clean. While the rolls are cooling, prepare the frosting: beat together 4 oz softened cream cheese and ¼ cup softened butter until creamy, then gradually add 1 ½ cups powdered sugar and ½ teaspoon vanilla until smooth. Spread a generous layer of frosting over each warm roll and sprinkle the remaining 2 tablespoons crushed Oreos on top for texture and visual appeal. Serve immediately for the best melt‑in‑your‑mouth experience.
Tips & Tricks
Perfecting the Recipe
Temperature‑Controlled Yeast: Use milk no hotter than 110°F; hotter liquid kills the yeast, while cooler liquid slows the rise, affecting texture.
Don’t Over‑Knead: Stop kneading once the dough is smooth and elastic. Over‑kneading can make the rolls tough rather than tender.
Even Rolling: Keep the dough thickness uniform; a thinner center ensures the filling spreads evenly and prevents a dry interior.
Second Rise Matters: Allow the shaped rolls to rise again. This step adds fluffiness and prevents a dense final product.
Flavor Enhancements
Add a teaspoon of espresso powder to the Oreo filling for a subtle coffee note that deepens the chocolate flavor. A drizzle of caramel sauce over the frosting right before serving introduces a buttery richness that complements the cookies‑and‑cream profile.
Common Mistakes to Avoid
Skipping the second rise results in flat, dense rolls. Also, avoid over‑baking; the edges can become overly crisp, leaving the interior dry. Keep an eye on the oven after 18 minutes and remove when the tops are just golden.
Pro Tips
Use a Bench Scraper: When cutting the rolled dough, a bench scraper yields clean, even slices without squashing the roll.
Room‑Temp Ingredients: Ensure butter, cream cheese, and egg are at room temperature; this promotes a smoother dough and frosting.
Finish with a Light Dusting: A quick sift of powdered sugar over the glazed rolls adds a decorative finish and a hint of extra sweetness.
Freeze for Later: After baking, let rolls cool completely, then freeze in an airtight container. Reheat directly from frozen for a “just‑baked” experience.
Variations
Ingredient Swaps
Swap regular Oreos for Double‑Stuffed or Mint‑Chocolate Oreos for a different flavor twist. Replace the butter in the dough with coconut oil for a subtle tropical note, or use almond flour for a gluten‑free base while maintaining a tender crumb.
Dietary Adjustments
For a vegan version, use plant‑based milk, dairy‑free butter, and a flax‑egg (1 tbsp ground flaxseed + 3 tbsp water). Substitute the cream cheese frosting with a whipped coconut cream mixed with powdered sugar and vanilla. Ensure the Oreo brand you choose is vegan‑friendly.
Serving Suggestions
Pair the rolls with a cold glass of vanilla‑bean milkshake or a robust cold brew coffee. For a brunch spread, serve alongside fresh fruit salad and a light citrus marmalade to cut through the richness. A dusting of cocoa powder on the frosting adds a sophisticated finish.
Storage Info
Leftover Storage
Allow any leftover rolls to cool completely, then place them in an airtight container. Store in the refrigerator for up to 4 days. For longer preservation, wrap each roll individually in plastic wrap, then seal the container and freeze for up to 3 months. This prevents freezer burn and keeps the frosting from absorbing odors.
Reheating Instructions
Reheat refrigerated rolls in a preheated 350°F oven, covered loosely with foil, for 10‑12 minutes until warmed through and the frosting softens. For frozen rolls, add 5 minutes to the time. A microwave on medium power for 30‑45 seconds works in a pinch, but the oven method retains the best texture.
Frequently Asked Questions
This Oreo Cookies and Cream Cinnamon Roll recipe blends the comforting warmth of classic cinnamon rolls with the iconic crunch and flavor of Oreo cookies, delivering a truly memorable treat. The step‑by‑step guide, handy tips, and versatile variations ensure you’ll master it every time, whether for a casual brunch or a festive celebration. Feel free to experiment with fillings, frostings, or dietary tweaks—cooking is an adventure, after all. Enjoy the sweet, creamy, and slightly crunchy delight that will have everyone asking for seconds!