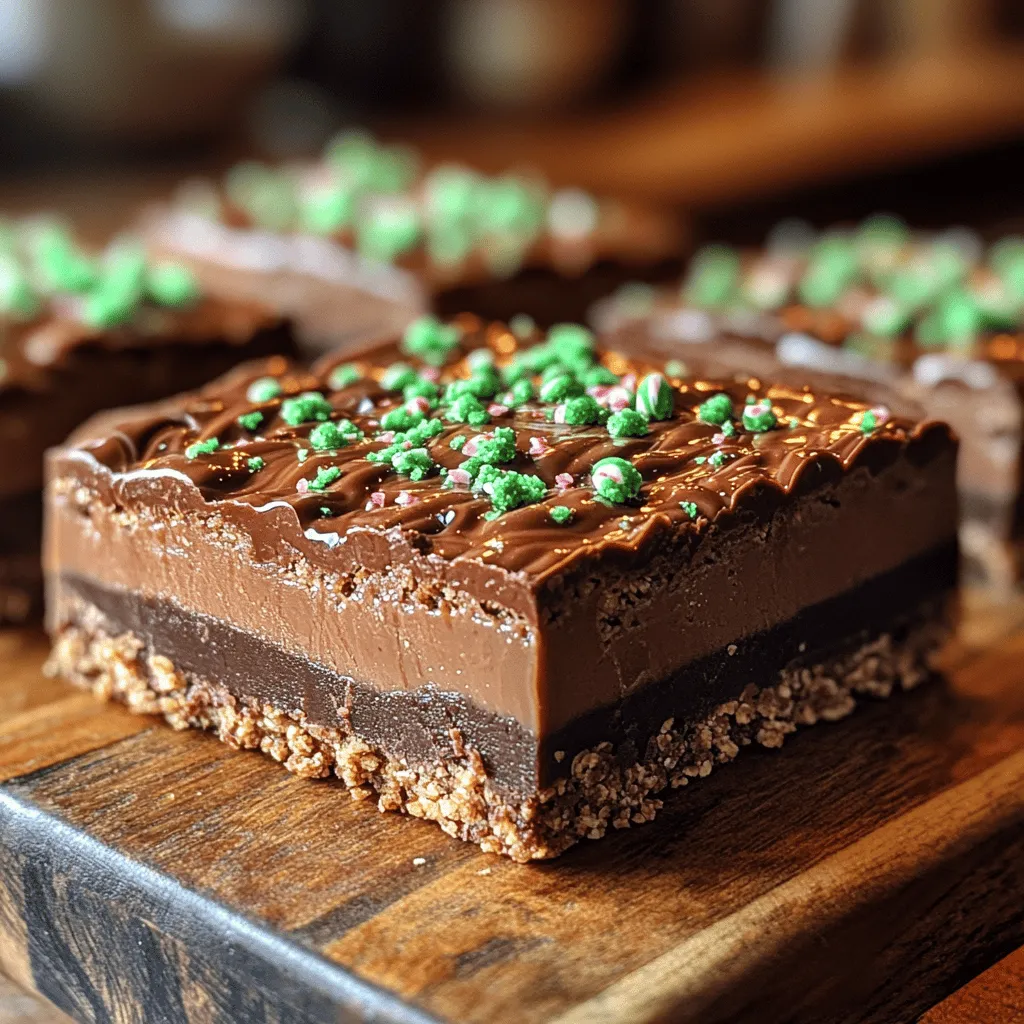
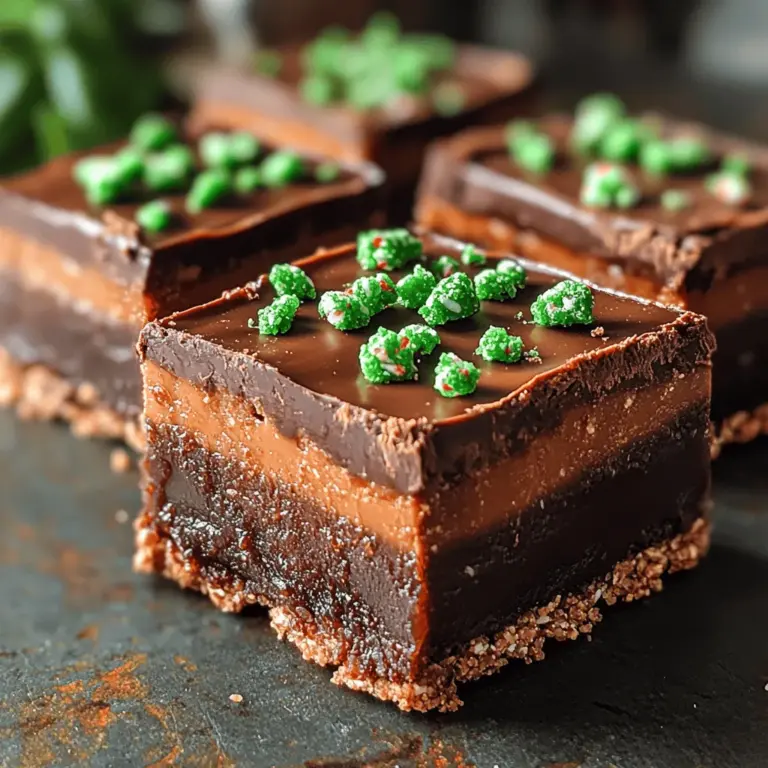
In the world of desserts, few treats can rival the indulgence of chocolate, especially when it’s paired with a refreshing hint of mint. The Minty Chocolate Bliss No-Bake Bars are not just a delightful sweet option; they are a guilt-free indulgence that satisfies cravings while nourishing the body. This recipe stands out for its combination of wholesome ingredients such as almond flour and medjool dates, which ensures that you can enjoy a delicious treat without compromising on health. Whether you’re looking for a quick dessert to impress guests or a nutritious snack to keep on hand, these no-bake bars are the perfect solution.
In this article, we’ll guide you through the recipe for Minty Chocolate Bliss No-Bake Bars, providing detailed instructions, insight into the ingredients, and the health benefits that come with them. Prepare to embark on a culinary journey that blends flavor and nutrition seamlessly.
Understanding the Appeal of No-Bake Desserts
No-bake desserts have surged in popularity in recent years, and it’s easy to see why. Here are some key reasons that contribute to the widespread appeal of these delectable treats:
Convenience of Quick Preparation
One of the most significant advantages of no-bake desserts is their ease of preparation. With minimal cooking equipment and no need for an oven, anyone can whip up a delicious dessert in a matter of minutes. This is particularly advantageous for those who may be pressed for time or lack experience in the kitchen. The Minty Chocolate Bliss No-Bake Bars require just a few simple steps and can be ready to enjoy in no time.
Health-Conscious Alternatives to Traditional Baked Goods
As more people become aware of the health implications of processed sugars and refined flours, there has been a growing demand for healthier dessert options. No-bake desserts often utilize natural sweeteners and nutrient-dense ingredients, making them a more wholesome choice compared to traditional baked treats. The Minty Chocolate Bliss Bars are a prime example, as they are made with ingredients that not only taste great but also provide essential vitamins, minerals, and antioxidants.
Ingredients Breakdown for Minty Chocolate Bliss No-Bake Bars
To make these delightful no-bake bars, you’ll need a few key ingredients that contribute not only to their flavor but also to their nutritional value. Let’s take a closer look at each component:
Almond Flour: A Gluten-Free Alternative Packed with Nutrients
Almond flour serves as the foundation for our no-bake bars, offering a gluten-free alternative to conventional flour. It’s made from finely ground almonds, making it rich in healthy fats, protein, and vitamin E. Almond flour also provides a subtle nuttiness to the bars, enhancing their overall flavor profile.
Medjool Dates: Natural Sweetness and Energy-Boosting Properties
Medjool dates are a natural sweetener that adds caramel-like flavor while providing a host of nutrients. They are high in fiber, which aids digestion, and they are rich in potassium, promoting heart health. The sticky texture of medjool dates helps to bind the ingredients together, ensuring that our bars hold their shape.
Cocoa Powder: A Rich Source of Antioxidants
Cocoa powder is not only responsible for the rich chocolate flavor of our bars but also offers numerous health benefits. It is loaded with antioxidants, which help combat oxidative stress in the body. Additionally, cocoa powder contains flavonoids that may improve heart health and boost cognitive function.
Pure Maple Syrup: A Healthier Sweetener
To enhance the sweetness of our bars, we use pure maple syrup, a natural sweetener that is less processed than granulated sugar. It contains minerals like manganese and zinc, and its lower glycemic index means it won’t cause the same rapid spike in blood sugar levels as traditional sugars.
Coconut Oil: Its Health Benefits and Unique Flavor
Coconut oil is another essential ingredient, known for its unique flavor and numerous health benefits. It is high in medium-chain triglycerides (MCTs), which can provide a quick source of energy. Coconut oil also adds a creamy texture to the bars, making them even more enjoyable to eat.
Peppermint Extract: The Refreshing Twist that Elevates the Flavor
The addition of peppermint extract is what truly elevates these bars and gives them their signature minty flavor. Beyond its delightful taste, peppermint is known for its digestive benefits and can help soothe an upset stomach. Just a few drops of this extract can make a significant difference in the overall flavor profile of the bars.
Sea Salt: Enhancing the Overall Taste Profile
Adding a pinch of sea salt may seem minor, but it plays a crucial role in enhancing the flavors of the ingredients. Salt can help balance sweetness and bring out the richness of the chocolate, creating a more complex and enjoyable taste.
Dark Chocolate Chips: Choosing the Right Type for Your Dietary Needs
For a touch of chocolate decadence, we include dark chocolate chips in our recipe. When selecting chocolate chips, look for ones with a high cocoa content (70% or more) for maximum health benefits. Dark chocolate is packed with antioxidants and may support heart health, making it a delicious and nutritious addition to our bars.
Optional Garnish: Crushed Peppermint Candies for Added Texture
For those who want to take their Minty Chocolate Bliss Bars to the next level, consider garnishing the top with crushed peppermint candies. This optional touch adds a delightful crunch and an extra burst of minty flavor, making the bars even more visually appealing.
Step-by-Step Guide to Making Minty Chocolate Bliss No-Bake Bars
Now that we’ve explored the enticing ingredients and their benefits, let’s dive into the step-by-step process of creating these delightful bars. The preparation is straightforward and can be broken down into a few simple steps.
Preparing the Base: Combining Ingredients for the Perfect Texture
1. Gather Your Ingredients: Before you begin, ensure you have all the necessary ingredients on hand and measured out for easy access. This will streamline the process and make it more enjoyable.
2. Blend the Base Ingredients: In a food processor, combine the almond flour, medjool dates, cocoa powder, coconut oil, and a pinch of sea salt. Pulse the mixture until it reaches a crumbly yet sticky consistency. The dates should be broken down and blended evenly with the other ingredients.
3. Add the Sweetener and Flavoring: Drizzle in the pure maple syrup and peppermint extract. Continue to process the mixture until everything is well combined and forms a cohesive dough. You may need to scrape down the sides of the processor a couple of times to ensure all ingredients are incorporated.
4. Incorporate Dark Chocolate Chips: Once the mixture is well combined, gently fold in the dark chocolate chips using a spatula. This will ensure that the chips are evenly distributed throughout the dough.
5. Press into a Pan: Line an 8×8-inch square baking pan with parchment paper for easy removal. Transfer the mixture into the pan and spread it evenly, pressing down firmly with your hands or a spatula to create a compact layer. Make sure there are no air pockets, as this will help the bars hold together.
6. Chill to Set: Place the pan in the refrigerator for at least 2 hours, or until the mixture is firm to the touch. Chilling is essential for allowing the bars to set properly, making them easier to cut into squares.
Once chilled, your Minty Chocolate Bliss No-Bake Bars will be ready to slice and serve.
Stay tuned for the next part of the article, where we’ll delve into some expert tips for achieving the best results with these bars and address common questions regarding the recipe. Whether you’re making them for a special occasion or simply to enjoy as a snack, these bars are sure to impress with their rich flavors and healthy ingredients.

Setting the Base: Techniques for Pressing and Smoothing
Creating the perfect base for your Minty Chocolate Bliss No-Bake Bars begins with proper preparation and technique. A well-pressed base provides a sturdy foundation for the rich layers that follow. To achieve an even and smooth base, follow these steps:
1. Prepare Your Pan: Start by lining an 8×8-inch or 9×9-inch square baking dish with parchment paper. Leave a little overhang on the sides to make it easier to lift the bars out later.
2. Mix Thoroughly: In a mixing bowl, combine your base ingredients—oats, nut butter, maple syrup (or any sweetener of your choice), and a touch of peppermint extract. Use a spatula or a wooden spoon to mix until all ingredients are well incorporated.
3. Pressing Technique: Transfer the mixture into the prepared pan. To press it down, use the back of a measuring cup or a flat-bottomed glass. This not only helps compact the mixture but also ensures an even surface. Start from the center and work your way to the edges, pressing firmly but gently to avoid crumbling.
4. Smoothing the Surface: Once you have the mixture pressed down, use the spatula to smooth the top. This step is crucial for ensuring your no-bake bars have a professional appearance. Aim for a flat, even layer, as this will help when you apply the chocolate topping.
Making the Chocolate Topping: Tips for Melting Chocolate Effortlessly
The chocolate topping is what elevates these bars to blissful heights. Here are effective methods for melting chocolate to perfection:
1. Choose the Right Chocolate: Use high-quality dark chocolate or dairy-free chocolate chips for a rich flavor. If you prefer a sweeter topping, semi-sweet chocolate works well.
2. Double Boiler Method: The best way to melt chocolate without burning it is to use a double boiler. Fill a saucepan with a couple of inches of water and bring it to a gentle simmer. Place a heatproof bowl on top of the saucepan, ensuring it doesn’t touch the water. Add your chocolate to the bowl and stir occasionally until melted and smooth.
3. Microwave Method: If you prefer a quicker option, you can melt chocolate in the microwave. Place chopped chocolate or chips in a microwave-safe bowl. Heat in 30-second intervals, stirring in between until completely melted. Be cautious not to overheat, as chocolate can seize up if it gets too hot.
4. Adding Coconut Oil: For a glossy finish and easier spreading, consider adding a teaspoon of coconut oil to your melted chocolate. This not only improves the texture but also helps the chocolate set nicely once poured over the bars.
Assembling the Bars: Achieving an Even Layer and Optional Garnishing
Once your base is ready and your chocolate is melted, it’s time to assemble your Minty Chocolate Bliss No-Bake Bars:
1. Pour the Chocolate Topping: Carefully pour the melted chocolate over the pressed oat base. Use a spatula to spread it evenly, ensuring every corner is covered.
2. Optional Garnishing: For an extra touch, consider garnishing the chocolate layer with crushed nuts, a sprinkle of sea salt, or even a few mint leaves. This not only adds visual appeal but enhances the flavor profile.
3. Chill the Bars: Place the assembled bars in the refrigerator for at least 2 hours or until the chocolate is firm. This chill time is vital for the bars to set properly, allowing for easier cutting and serving later on.
Chilling and Serving: Ensuring the Perfect Consistency
After chilling, your bars should be firm yet slightly soft to the touch. Here’s how to ensure they are perfectly set for serving:
1. Check Consistency: Before serving, test the bars by gently pressing down on the top. They should feel firm but still give a little under pressure. If they feel too soft, return them to the refrigerator for additional time.
2. Cutting the Bars: Once set, use the parchment paper overhang to lift the bars out of the baking dish. Place them on a cutting board and use a sharp knife to slice into squares or rectangles. Wipe the knife with a damp cloth between cuts to ensure clean edges.
3. Serving Suggestions: These bars can be enjoyed as a snack or dessert. For a special touch, serve them drizzled with additional melted chocolate or alongside a scoop of vegan ice cream.
Nutritional Information
These Minty Chocolate Bliss No-Bake Bars not only taste delightful but also carry a range of health benefits:
– Analyzing the Health Benefits of Each Ingredient:
– Oats: A great source of fiber, oats can help lower cholesterol and keep you feeling full longer.
– Nut Butter: Packed with healthy fats and protein, nut butter supports heart health and provides sustained energy.
– Cacao or Chocolate: Dark chocolate is rich in antioxidants and has been linked to various health benefits, including improved heart health when consumed in moderation.
– Estimated Nutritional Values Per Serving:
– Serving Size: 1 bar (based on 16 bars per recipe)
– Calories: Approximately 150 kcal
– Protein: 4g
– Carbohydrates: 20g
– Fat: 7g
– Fiber: 3g
– Sugars: 5g
– How These Bars Fit into Various Dietary Lifestyles:
– Vegan: Made with plant-based ingredients, these bars are suitable for vegans.
– Gluten-Free: As long as you use certified gluten-free oats, this recipe is safe for those with gluten intolerance.
– Refined Sugar-Free: Using natural sweeteners like maple syrup makes these bars a healthier option for those avoiding refined sugars.
Creative Variations and Customizations
One of the best aspects of the Minty Chocolate Bliss No-Bake Bars is their versatility. Here are some creative ways to tailor the recipe to suit your taste:
1. Exploring Different Flavor Combinations:
– Swap out the peppermint extract for orange zest or almond extract for a different flavor profile.
– Add crushed fruit, such as raspberries or strawberries, to the base for a fruity twist.
2. Substituting Ingredients Based on Dietary Preferences:
– Use sunflower seed butter instead of nut butter for a nut-free version.
– Replace oats with ground almonds for a lower-carb option.
3. Adding Superfoods for an Extra Health Boost:
– Mix in chia seeds or flaxseeds for added fiber and omega-3 fatty acids.
– Consider incorporating a tablespoon of spirulina or protein powder into the base for a nutritional enhancement.
Storing and Serving Suggestions
To enjoy your Minty Chocolate Bliss No-Bake Bars over a longer period, it’s essential to store them properly:
1. Best Practices for Storing No-Bake Bars:
– Store the bars in an airtight container in the refrigerator for up to one week. If you want to keep them longer, they can be frozen for up to three months.
– Cut the bars before freezing and layer them with parchment paper to prevent sticking.
2. Ideas for Serving at Gatherings or as a Snack:
– These bars make a fantastic addition to dessert platters at parties or potlucks.
– Serve them as a midday snack for a healthy pick-me-up or a post-workout treat.
3. Pairing Suggestions with Beverages or Other Desserts:
– Pair the bars with a cup of herbal tea or coffee for a delightful afternoon treat.
– Serve them alongside fresh fruit or a light yogurt for a balanced dessert option.
Conclusion: The Delight of Minty Chocolate Bliss No-Bake Bars
In summary, the Minty Chocolate Bliss No-Bake Bars offer a deliciously healthy and easy-to-make dessert option. With their rich flavor, wholesome ingredients, and versatility, they appeal to a wide range of dietary preferences while satisfying your sweet cravings.
By embracing healthier dessert options like these bars, you not only indulge in a treat but also infuse your diet with nutritious ingredients. The joy of creating these no-bake bars lies not only in the process but also in the enjoyment of sharing and savoring them with friends and family. Whether you’re looking for a quick snack or a crowd-pleasing dessert, these bars are sure to impress and delight. So gather your ingredients, get creative, and enjoy the bliss of these minty chocolate treats!

