Introduction
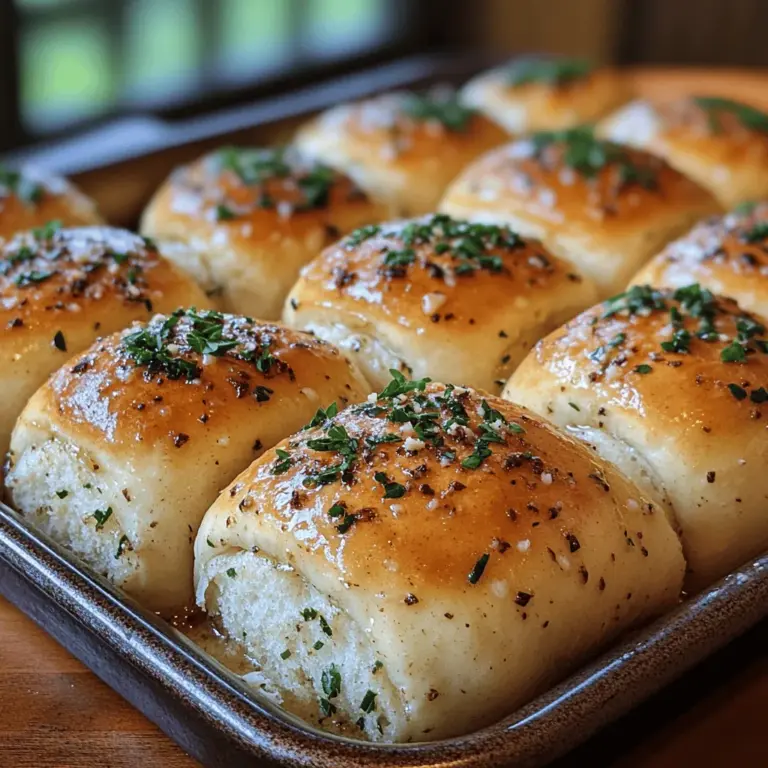
There’s something undeniably comforting about the smell of freshly baked bread wafting through your home. Among the various bread recipes, *Heavenly Buttery Garlic Herb Rolls* stand out as a delightful addition to any meal. These rolls are not only a feast for your taste buds but also an impressive centerpiece that can elevate even the simplest of dishes. Imagine breaking open a warm, fluffy roll, revealing a buttery interior infused with aromatic garlic and fresh herbs. It’s a culinary experience that can turn an ordinary dinner into an extraordinary one.
Homemade bread rolls have a special place in many kitchens, where they serve not just as a side dish but as a way to bring family and friends together. The act of making bread is both therapeutic and rewarding; the kneading of the dough, the anticipation of the rise, and the joyous moment of pulling a batch of golden rolls from the oven create cherished memories. In this recipe, we’ll focus on the key flavors that make these rolls so irresistible: the buttery richness, the savory garlic notes, and the freshness of herbs.
This recipe is versatile, allowing you to customize your rolls with optional ingredients like Parmesan cheese for an added depth of flavor. Whether you’re serving them alongside a hearty soup, a festive roast, or simply enjoying them on their own, these Heavenly Buttery Garlic Herb Rolls are sure to become a staple in your baking repertoire.
Understanding the Ingredients
The success of your Heavenly Buttery Garlic Herb Rolls lies in the quality and balance of the ingredients used. Each component plays a crucial role in achieving the perfect texture, flavor, and aroma.
All-Purpose Flour
All-purpose flour serves as the foundation for your rolls. Its gluten content provides the necessary structure and elasticity to the dough, allowing it to rise and hold its shape. For optimal results, ensure you measure your flour correctly—scooping directly from the bag can lead to using too much flour, resulting in dense rolls. A kitchen scale is an excellent tool for accuracy, or you can spoon the flour into your measuring cup and level it off with a knife.
Active Dry Yeast
At the heart of any bread recipe is yeast, specifically active dry yeast in this case. Yeast is a living organism that ferments sugars in the dough, producing carbon dioxide gas which causes the dough to rise. To activate the yeast, it’s essential to create the right environment—warm, but not hot, water is ideal. This process not only helps the rolls rise but also contributes to their flavor and texture.
Warm Milk
Warm milk is another critical ingredient that aids in activating the yeast while also enriching the dough. The warmth helps the yeast thrive, while the fat and proteins in milk contribute to a tender crumb and a richer flavor profile. Make sure the milk is warmed to about 110°F (43°C)—too hot can kill the yeast, while too cold will not activate it properly.
Granulated Sugar
Granulated sugar serves a dual purpose in this recipe. First, it sweetens the rolls, balancing the savory flavors of garlic and herbs. Second, sugar is vital for yeast activation; it provides food for the yeast, helping it to grow and produce the gas necessary for the dough to rise. A small amount is all you need to enhance both flavor and fermentation.
Unsalted Butter
Butter is the star ingredient when it comes to flavor and texture. Unsalted butter is preferred to control the saltiness of the rolls; it also allows you to add the precise amount of salt needed for flavor. When using butter, the recipe calls for it to be melted, which not only aids in mixing the dough but also ensures a moist, tender roll with a rich buttery taste.
Egg
The inclusion of an egg in the dough serves multiple purposes. It acts as a binding agent, helping to hold the ingredients together, while also enriching the dough with additional fat and protein. This contributes to a softer, fluffier roll with a beautiful golden color when baked. Be sure to beat the egg lightly before adding it to the mixture for even distribution.
Salt
Salt is an essential ingredient that enhances the overall flavor of the rolls. It also plays a crucial role in controlling yeast activity, preventing it from fermenting too quickly. Too much salt can inhibit yeast growth, while too little can lead to overly rapid fermentation, resulting in poor texture. Finding the right balance is key to achieving perfectly risen rolls.
Garlic and Herbs
The flavor profile of these rolls shines through the combination of garlic and fresh herbs. Fresh garlic provides a pungent, aromatic quality, while herbs like rosemary, thyme, or parsley add a fresh, earthy note. While dried herbs can be used in a pinch, fresh herbs will yield a more vibrant flavor and aroma. Feel free to experiment with your favorite herbs to create a unique twist on this classic recipe.
Parmesan Cheese (Optional)
For those who want to take their rolls to the next level, adding Parmesan cheese can provide an additional layer of flavor that complements the garlic and herbs beautifully. This optional ingredient can be mixed into the dough or sprinkled on top before baking for a delightful cheesy crust. Choose a high-quality Parmesan for the best results, as its complex flavor will shine through in the finished rolls.
Step-by-Step Instructions for Heavenly Buttery Garlic Herb Rolls
Creating these heavenly rolls is a straightforward process that involves several key steps, each contributing to the final product’s deliciousness. Let’s walk through the process together.
Activating the Yeast
The first step in making Heavenly Buttery Garlic Herb Rolls is to activate the yeast. In a small bowl, combine warm milk and granulated sugar, stirring gently to dissolve the sugar. Sprinkle the active dry yeast over the surface of the liquid and allow it to sit for about 5 to 10 minutes. During this time, you should see the yeast begin to bubble and foam, indicating that it is active and ready to use. If there’s no reaction, it’s best to start over with fresh yeast, as this could affect the rise of your rolls.
Mixing the Dough
Once the yeast is activated, it’s time to mix the dough. In a large mixing bowl, combine the all-purpose flour and salt. Make a well in the center and add the melted butter, beaten egg, and the yeast mixture. Using a wooden spoon or a spatula, stir the ingredients together until a shaggy dough forms. You may need to adjust the flour or liquid slightly to achieve the right consistency—aim for a dough that pulls away from the sides of the bowl but remains slightly sticky to the touch.
Kneading Techniques
Kneading is a crucial step in developing the gluten structure of the dough, which gives the rolls their light and airy texture. You can knead the dough either by hand or using a stand mixer fitted with a dough hook.
If kneading by hand, turn the dough out onto a lightly floured surface. With clean hands, fold the dough over onto itself and push down with the heel of your hand. Rotate the dough a quarter turn and repeat the process for about 8-10 minutes, or until the dough is smooth and elastic.
If using a stand mixer, mix on low speed for about 5-7 minutes until the dough pulls away from the bowl and is smooth. Whichever method you choose, you can test for doneness by performing the “windowpane test”—stretch a small piece of dough between your fingers. If it stretches into a thin membrane without tearing, it’s ready for the next step.
First Rise
After kneading, place the dough in a lightly greased bowl, covering it with a damp cloth or plastic wrap to prevent it from drying out. Place the bowl in a warm, draft-free area to allow the dough to rise. This first rise usually takes about 1 to 1.5 hours, or until the dough has doubled in size. You can check its readiness by gently pressing two fingers into the dough; if the indent remains, it’s ready to proceed.
Preparing the Garlic Herb Butter
While the dough is rising, take the opportunity to prepare your garlic herb butter. In a small saucepan over low heat, melt unsalted butter and add minced garlic, allowing it to infuse for a few minutes. Be careful not to brown the garlic, as this can lead to a bitter flavor. Remove the saucepan from the heat and stir in your choice of fresh or dried herbs. This aromatic butter will be brushed on the rolls before and after baking, imparting a rich flavor that enhances the overall taste.
Shaping the Rolls
Once the dough has risen, it’s time to shape the rolls. Gently punch down the dough to release the air and turn it out onto a lightly floured surface. Divide the dough into equal portions, about 2 ounces each, for uniform rolls. Shape each piece into a tight ball by pulling the edges towards the center and rolling it between your palms. Place the shaped rolls seam-side down in a greased baking dish or on a parchment-lined baking sheet, ensuring they are close but not touching.
Next, cover the rolls with a clean cloth and let them rise again for about 30 to 45 minutes, or until they have puffed up significantly. This second rise is essential for achieving that fluffy texture.
In the next part of this article, we will delve into the final steps of baking your Heavenly Buttery Garlic Herb Rolls, including tips for achieving a beautiful golden crust and the ultimate serving suggestions. Stay tuned for more delightful insights into this delicious recipe!
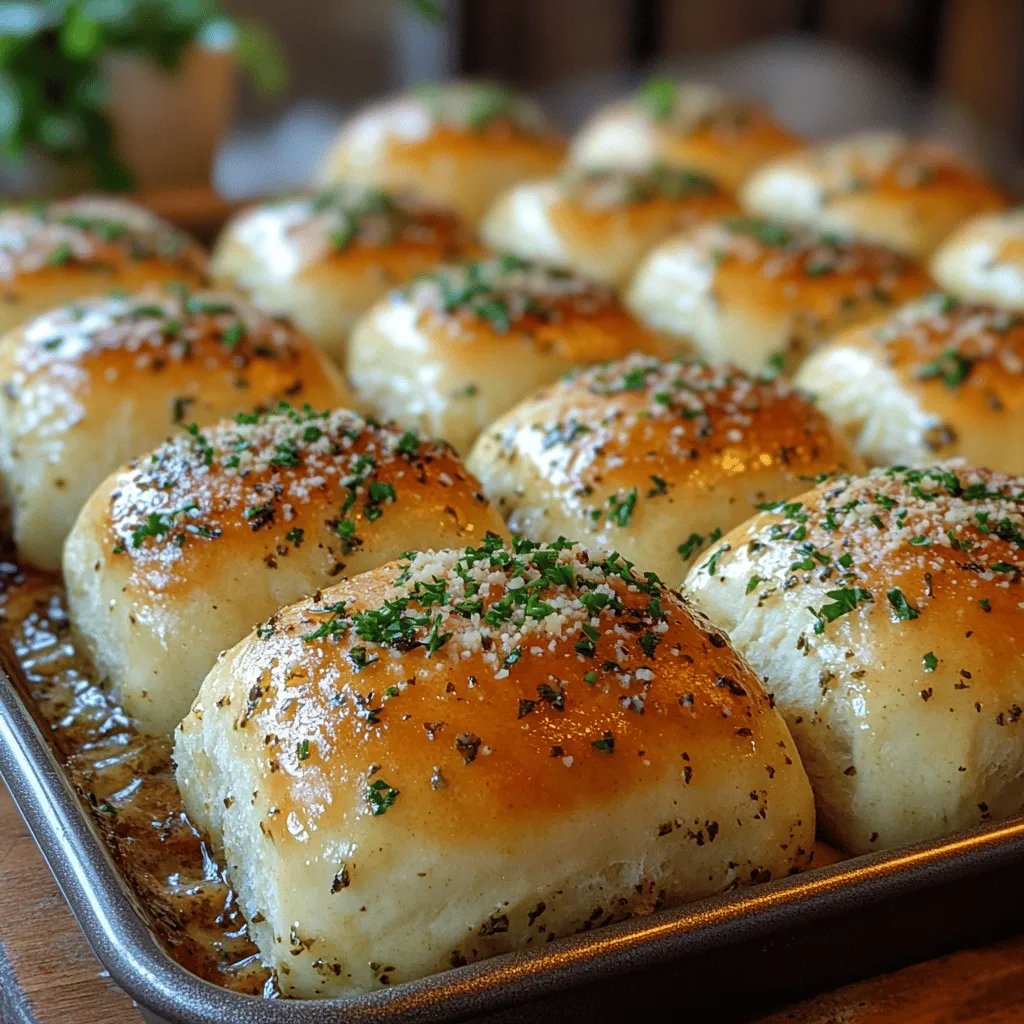
Heavenly Buttery Garlic Herb Rolls
Second Rise
After you’ve shaped your rolls, the second rise is a crucial step that should never be overlooked. This phase allows the yeast to ferment and produce carbon dioxide, which will lead to the delightful fluffiness of your rolls. The second rise typically takes about 30 to 60 minutes, depending on the temperature of your kitchen. A warm environment helps speed up the process, so you might consider placing the rolls in a slightly warmed oven (turned off) or near a sunny window.
During this time, the dough will expand, creating air pockets that will yield a light and airy texture once baked. Be sure to cover the rolls with a clean kitchen towel to prevent them from drying out. Remember, patience is key; allowing your rolls to rise adequately will reward you with soft, pillowy goodness.
Preheating the Oven
Before you bake your rolls, it is essential to preheat your oven to 375°F (190°C). Preheating ensures that your rolls start cooking immediately, which helps prevent them from becoming dense. An oven thermometer is a good investment to ensure your oven is at the right temperature, as many home ovens can be off by quite a bit.
Once the oven is preheated, the consistent temperature will allow for even baking, helping the rolls achieve that perfect golden-brown crust while keeping the inside tender and fluffy.
Brushing and Baking Techniques
To achieve a golden crust and enhance the flavor of your garlic herb rolls, brush the tops with melted butter before placing them in the oven. This not only adds a rich buttery flavor but also helps to achieve that desirable golden color. For added flavor depth, you can mix minced garlic and finely chopped herbs into the butter before brushing it onto the rolls.
Bake the rolls for about 15 to 20 minutes until they are beautifully golden brown and have a slightly firm exterior. During the last few minutes of baking, keep an eye on them to prevent over-browning. An excellent trick for checking doneness is to tap the bottom of a roll; if it sounds hollow, it’s ready to come out of the oven.
Final Touch
As soon as your rolls are out of the oven, you have the perfect opportunity to elevate their flavor even further. Brush them once again with a bit of melted garlic butter or herb-infused oil. You can also sprinkle a touch of sea salt over the top for an added flavor burst. This final step not only enhances the look of your rolls with a glistening finish but also ensures the flavors are intense and aromatic.
The Science of Baking Bread Rolls
Understanding the science behind baking can enhance your skills and improve the results of your homemade rolls.
Yeast Fermentation
Yeast is a living organism that plays a vital role in bread-making. During fermentation, yeast consumes sugars in the dough and produces carbon dioxide and alcohol. The carbon dioxide gas creates bubbles that make the dough rise, resulting in the light and airy texture of the rolls. It’s essential to ensure that your yeast is active; if it’s past its expiration date or hasn’t been stored correctly, it may not work effectively, leading to flat rolls.
Gluten Development
Kneading is essential in developing gluten, the protein that gives bread its structure and chewiness. When you knead the dough, you’re creating a network of gluten strands that trap the gas produced by yeast, helping the dough rise. A well-kneaded dough should be smooth and elastic. If it’s too sticky or doesn’t hold its shape, it may need more kneading.
Temperature Effects
Temperature plays a significant role in the fermentation and baking processes. During the rise, warmer temperatures speed up yeast activity, while cooler temperatures slow it down. When baking, high temperatures create steam that helps the rolls expand, while the heat sets the structure of the rolls. This is why preheating your oven is key; it ensures the rolls start baking at the right temperature for optimal rise and crust formation.
Serving Suggestions for Garlic Herb Rolls
Heavenly buttery garlic herb rolls are incredibly versatile and pair well with various dishes.
Complementary Dishes
These rolls are ideal for serving alongside hearty soups, fresh salads, or grilled meats. They can complement a creamy potato leek soup or a robust minestrone soup beautifully, providing a delightful texture contrast. For salads, consider serving them with a classic Caesar salad or a vibrant Mediterranean salad, where the rolls can be used to scoop up dressing and toppings.
Using as Appetizers
Transform your garlic herb rolls into an appetizer by serving them warm with a side of herbed olive oil or whipped butter. You can also slice them in half and fill them with savory fillings like roasted vegetables, cheeses, or cured meats for a delicious starter. For entertaining, consider pairing them with a charcuterie board, where guests can enjoy them with various cheeses, meats, and spreads.
Variations
Don’t hesitate to experiment with flavors! You can add shredded cheese like mozzarella or parmesan into the dough for a cheesy twist. Herbs can also be varied; try adding rosemary, thyme, or even a hint of chili flakes for a spicy kick. Mixing in some finely chopped sun-dried tomatoes or olives can also add a Mediterranean flair to your rolls.
Health Benefits of Homemade Bread
Making bread at home offers several health benefits compared to store-bought alternatives.
Control Over Ingredients
When you bake your bread rolls, you have complete control over what goes into them. This means you can opt for healthier ingredients, such as whole grain flours, reduced sugar, and no preservatives. Homemade rolls can be tailored to suit dietary preferences and restrictions, making them a much healthier option.
Nutrition Boost
Using whole grains or alternative flours, such as almond or spelt, can significantly enhance the nutritional profile of your rolls. Whole grains provide more fiber and essential nutrients, contributing to better digestive health and sustained energy levels.
Mindful Eating
Baking at home encourages mindfulness and connection with the food you consume. The process of creating something from scratch can be incredibly therapeutic and satisfying. This enjoyment can lead to more thoughtful eating practices, as you appreciate the effort that goes into your meals.
Common Mistakes to Avoid
Baking can be tricky, and there are several common pitfalls to watch out for when making rolls.
Over or Under-kneading
Finding the right balance in kneading is crucial. Over-kneading can lead to tough rolls, while under-kneading may result in a dense texture. Aim for a smooth and elastic dough that springs back when poked; this indicates proper gluten development.
Improper Yeast Activation
Always check your yeast before starting the recipe to ensure it’s active. If the yeast doesn’t bubble in warm water with sugar after about 5 to 10 minutes, it may be inactive. Using expired or improperly stored yeast can lead to rolls that don’t rise.
Ignoring Rise Times
Don’t rush the rising process. Each rise is essential for developing flavor and texture. If you cut the rising time short, you’ll end up with dense rolls. Always allow the dough ample time to rise, as patience will reward you with fluffy, flavorful rolls.
Conclusion
Heavenly buttery garlic herb rolls are not just a side dish; they are a celebration of flavors and textures that enhance any meal. Their versatility makes them suitable for various occasions, from casual family dinners to elegant gatherings. Baking these rolls at home not only allows you to experiment with different flavors but also provides a sense of accomplishment that is hard to match.
We encourage you to try your hand at this recipe, experiment with flavors, and share your experiences. The joy of baking comes not just from the end result, but from the process itself and the satisfaction of enjoying something made with love. Whether you serve them fresh from the oven or use them to complement your favorite dishes, these garlic herb rolls are sure to become a beloved staple in your kitchen. Happy baking!
