Easy Sourdough Bread for Beginners – A Foolproof Homemade Recipe
 Save
Save
It was a crisp Saturday morning in early spring, the kind of day when the sun is just shy enough to make the kitchen feel like a warm hug. I remember pulling my grandmother’s old cast‑iron pot out of the pantry, feeling the cool metal under my fingertips, and hearing the faint hum of the house as the kettle began to sing. The moment I mixed the first spoonful of starter into the warm water, a tiny ripple of sourdough perfume rose like a promise, and I knew this loaf would be something special. That first breath of aroma—tangy, earthy, with a whisper of sweet wheat—has become my personal reminder that simple ingredients can create unforgettable moments.
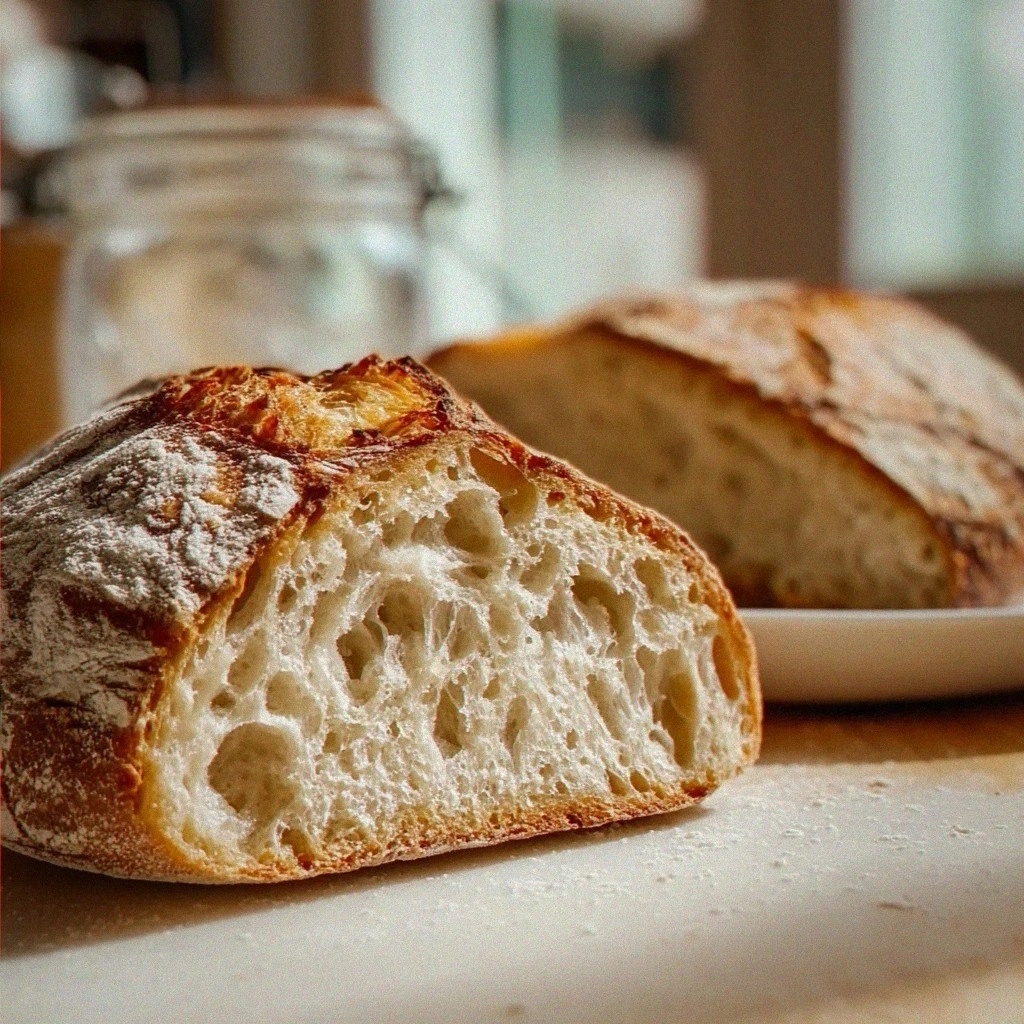
Fast forward a few years, and I’ve turned that nostalgic memory into a foolproof recipe that anyone can follow, even if you’ve never even heard the word “levain” before. The beauty of this sourdough is that it doesn’t demand a culinary degree; it just asks for a bit of patience, a sprinkle of curiosity, and the willingness to let nature do its magic. Imagine the crackle of the crust as you slice into it, the airy crumb that springs back when you press it lightly, and the way the buttery, slightly tangy flavor fills the room—your family will gather around the table, eyes wide, asking, “Can I have another slice?”
But wait—there’s a secret trick in step four that will make your loaf rise like a cloud, and I’ll spill the beans later in this article. Have you ever wondered why the best bakery sourdoughs have that unmistakable depth of flavor that seems to linger on the palate forever? The answer lies in a handful of tiny decisions that we’ll explore together, from the temperature of your water to the exact moment you fold the dough. Trust me, once you master those little nuances, you’ll never look at bread the same way again.
Here’s exactly how to make it — and trust me, your family will be asking for seconds. Grab a bowl, a wooden spoon, and a dash of excitement, because we’re about to embark on a journey that turns humble flour and water into a loaf that sings. Ready? Let’s dive in and bring that fragrant, golden‑brown masterpiece to life.
🌟 Why This Recipe Works
- Flavor Depth: The natural fermentation of a sourdough starter creates a complex bouquet of tangy, nutty, and slightly sweet notes that you simply can’t achieve with commercial yeast. Each bite delivers a layered taste that evolves as the loaf cools, making it a perfect companion for both sweet spreads and savory toppings. This depth is why even a simple slice feels like a gourmet experience.
- Chewy Crumb: By allowing the dough to rest and develop gluten slowly, the crumb becomes airy yet resilient, giving you that satisfying “chew” without being dense. The long fermentation breaks down proteins, resulting in a texture that’s both light and hearty. It’s the kind of crumb that holds up beautifully under butter, cheese, or a thick slice of avocado.
- Ease of Technique: While sourdough can sound intimidating, this recipe strips away the complexity and focuses on a handful of reliable steps. No fancy equipment, no fancy math—just a clear timeline and a few visual cues that even beginners can master. The process feels like a guided meditation, and the results speak for themselves.
- Time Flexibility: The bulk fermentation can be adjusted to fit your schedule; a shorter rise on a warm day or an overnight proof in the fridge works just as well. This flexibility means you can fit sourdough into a busy weeknight or turn it into a weekend ritual. The dough will thank you either way.
- Versatility: Once you’ve mastered the basic loaf, you can easily adapt it into rolls, pizza crusts, or even a hearty sandwich base. The same dough can be shaped into a rustic boule, a smooth batard, or a playful mini loaf for kids. The possibilities keep the kitchen exciting long after the first loaf.
- Nutrition Boost: The natural fermentation process breaks down phytic acid, making minerals like iron and zinc more bioavailable, and it also pre‑digests some of the gluten, which can be gentler on the stomach. The result is a bread that’s not only delicious but also a little kinder to your body. Pair it with wholesome toppings for a truly balanced meal.
- Ingredient Quality: This recipe relies on just four simple ingredients, letting the quality of each shine through. When you use a good bread flour and a lively starter, the flavor and texture elevate instantly. It’s a reminder that great cooking often starts with great basics.
- Crowd‑Pleasing Factor: There’s something magical about the smell of sourdough baking that draws people into the kitchen. The golden crust, the crackle, the aroma—these sensory cues make even the most skeptical eaters eager to try a bite. It’s a perfect way to impress guests without spending hours in front of the stove.
🥗 Ingredients Breakdown
The Foundation: Flour & Water
Bread flour is the backbone of any good sourdough because its higher protein content creates a strong gluten network that can trap the gases released by the starter. When you feel the dough come together, you’ll notice a slight elasticity that hints at the structure forming beneath the surface. If you can’t find bread flour, a blend of all‑purpose flour with a tablespoon of vital wheat gluten per cup works as a solid substitute, though the texture may be a touch less chewy.
The water should be warm—about 85°F (29°C)—which gives the yeast a comfortable environment to start feeding without shocking the starter. Too hot and you risk killing the delicate microbes; too cold and the fermentation will crawl. I always use a kitchen thermometer to check, and if you don’t have one, a quick finger test (the water should feel comfortably warm, not hot) does the trick.
The Living Heart: Active Sourdough Starter
Your starter is a living culture of wild yeast and lactobacilli that brings that signature tang and airy crumb to the loaf. An active starter should double in size within 4‑6 hours of feeding and have a pleasant, slightly fruity aroma. If your starter is sluggish, give it a boost with a fresh feeding 12‑24 hours before you begin, and keep it at room temperature for the best activity.
For those who don’t have a starter yet, you can create one with equal parts flour and water, feeding it daily for about a week. It’s a rewarding experiment—watching the bubbles appear and the smell change from yeasty to pleasantly sour. Once you have a bubbly starter, you’ll never look back.
The Flavor Enhancer: Salt
Salt does more than just season; it tightens the gluten network, controls fermentation speed, and deepens the overall flavor profile. Adding it at the right moment—after the autolyse—ensures it distributes evenly without inhibiting the starter’s initial activity. I recommend sea salt or kosher salt for a cleaner taste; avoid table salt, which can contain anti‑caking agents that affect the dough.
A common mistake is to add the salt too early, which can stifle the starter’s growth and result in a dense loaf. By waiting until the dough has rested for the autolyse period, you give the flour a chance to fully hydrate, creating a more extensible dough that’s easier to shape.
The Secret Weapons: Temperature & Time
Temperature is the silent conductor of the sourdough symphony. A warm kitchen (around 75°F/24°C) accelerates fermentation, while a cooler environment slows it down, giving you more control over the flavor development. If you live in a chilly climate, a proofing box or a turned‑off oven with the light on can provide the gentle warmth needed for a steady rise.
Time, on the other hand, is where patience becomes your best friend. The longer the bulk fermentation, the more complex the flavor, but there’s a sweet spot where the dough is airy yet still manageable. Trust the visual cues—bubbles forming on the surface, a slight domed shape, and a fragrant aroma—to guide you more than the clock.
With your ingredients prepped and ready, let's get cooking. Here's where the fun really begins...

🍳 Step-by-Step Instructions
🔐 Expert Tips for Perfect Results
The Taste Test Trick
Before you even think about baking, give your starter a quick “taste test.” A lively starter should smell bright, a bit like yogurt with a hint of fruit. If it smells flat or overly acidic, feed it a couple of times before using it in the dough. This small step ensures the yeast is vigorous enough to give your loaf the lift it deserves.
Why Resting Time Matters More Than You Think
The overnight cold proof is not just a convenience; it’s a flavor accelerator. The slow fermentation allows the lactic acid bacteria to break down more starches, creating that signature sourdough tang while also improving the crumb’s openness. If you’re in a hurry, a warm proof will still work, but you’ll miss out on the nuanced complexity that a longer, cooler rise provides.
The Seasoning Secret Pros Won’t Tell You
A pinch of fine sea salt on the crust right before baking can dramatically enhance the flavor contrast between the crust and crumb. I like to sprinkle a tiny dash of flaky Himalayan pink salt just as the loaf goes into the oven; the salt melts into the crust, creating little bursts of savory pop that make each bite unforgettable.
How to Tell When the Dough Is Ready to Shape
One of the most reliable visual cues is the “poke test.” Gently press a fingertip into the dough; if the indentation springs back slowly, the dough is at the perfect hydration level for shaping. If it springs back instantly, it’s still under‑fermented; if it stays indented, you’ve over‑proofed and may need to reshape carefully.
Storing the Starter for Longevity
A healthy starter can last indefinitely with proper care. Keep it in a glass jar, feed it weekly if stored in the refrigerator, and always use a clean spoon to avoid contamination. I’ve kept my starter alive for over a decade, and each loaf feels like a tribute to that ongoing partnership between me and the microbes.
The Final Slice Moment
When you finally cut into the loaf, listen for that satisfying “crack” as the crust gives way. The interior should be a light, honey‑colored crumb with irregular holes that tell the story of a well‑fermented dough. Serve it warm with butter, jam, or even a slice of cheese—the possibilities are endless, and every bite will remind you why you started this journey in the first place.
🌈 Delicious Variations to Try
One of my favorite things about this recipe is how versatile it is. Here are some twists I've tried and loved:
Olive & Rosemary Rustic Loaf
Fold in a handful of chopped Kalamata olives and a tablespoon of fresh rosemary during the stretch‑and‑fold stage. The salty brine of the olives pairs beautifully with the earthy rosemary, creating a Mediterranean‑inspired loaf that’s perfect for a quick bruschetta.
Whole‑Wheat Honey Sweetbread
Replace 150 g of the bread flour with whole‑wheat flour and add 2 tablespoons of honey to the water. The whole‑wheat adds nutty depth, while the honey introduces a subtle sweetness that balances the sour tang. This version is wonderful toasted with a smear of ricotta.
Cheddar & Jalapeño Kick
Stir in 100 g of shredded sharp cheddar and a finely diced jalapeño after the autolyse. The cheese melts into pockets of gooey richness, while the jalapeño offers a gentle heat that awakens the palate. It’s a crowd‑pleaser for game night or a bold sandwich base.
Cinnamon‑Sugar Swirl
For a breakfast‑friendly version, mix 2 tablespoons of cinnamon and 2 tablespoons of brown sugar into the dough after the first stretch‑and‑fold. When you slice the loaf, you’ll see beautiful caramelized swirls that taste like a cozy morning treat.
Seed‑Crusted Artisan Loaf
Before the final bake, brush the loaf with a little water and sprinkle a mixture of sunflower seeds, pumpkin seeds, and flaxseeds on top. The seeds toast in the oven, adding a delightful crunch and a nutty aroma that elevates the loaf to artisanal status.
📦 Storage & Reheating Tips
Refrigerator Storage
Store the cooled loaf in a paper bag inside a sealed plastic container to maintain crust crispness while keeping the crumb moist. It will stay fresh for up to three days, and the flavors continue to develop slightly as it rests. If you notice the crust softening, a quick 5‑minute reheat in a 350°F oven will revive it.
Freezing Instructions
Slice the loaf before freezing; this way you can toast individual pieces without thawing the whole loaf. Wrap the slices tightly in parchment paper, then place them in a freezer‑safe zip‑lock bag. They’ll keep for up to three months, and when you’re ready, a quick 2‑minute toast brings back that fresh‑baked texture.
Reheating Methods
To reheat a whole loaf without drying it out, lightly mist the crust with water, wrap it in foil, and bake at 300°F for 10‑12 minutes. The splash of moisture creates steam inside the foil, reviving the crust’s crunch while keeping the interior soft. For a faster fix, pop slices in a toaster or a hot skillet with a dab of butter.
❓ Frequently Asked Questions
Can I use all‑purpose flour instead of bread flour?
How long can I keep the starter at room temperature?
Why is my dough not rising during bulk fermentation?
Can I skip the overnight cold proof?
What’s the best way to score the loaf?
How do I know when the bread is fully baked?
Can I add whole grains or seeds to the dough?
Why does my crust sometimes turn too dark?









Other Reader Favorites
 Desserts
Creamy Custard Mochi Balls: Delightfully Chewy and Smooth
Learn how to make delicious Creamy Custard Mochi Balls: Delightfully Chewy and Smooth. Easy recipe with…
 Appetizers
Luscious Low-Carb Chicken Lettuce Wraps
Delicious Luscious Low-Carb Chicken Lettuce Wraps
 Desserts
Apple Pie Cinnamon Roll Casserole Delight
Learn how to make delicious Apple Pie Cinnamon Roll Casserole Delight. Easy recipe with step-by-step instructions.
 Appetizers
healthy citrus and herb salad with oranges and spinach
Learn how to make delicious healthy citrus and herb salad with oranges and spinach. Easy recipe…