Introduction
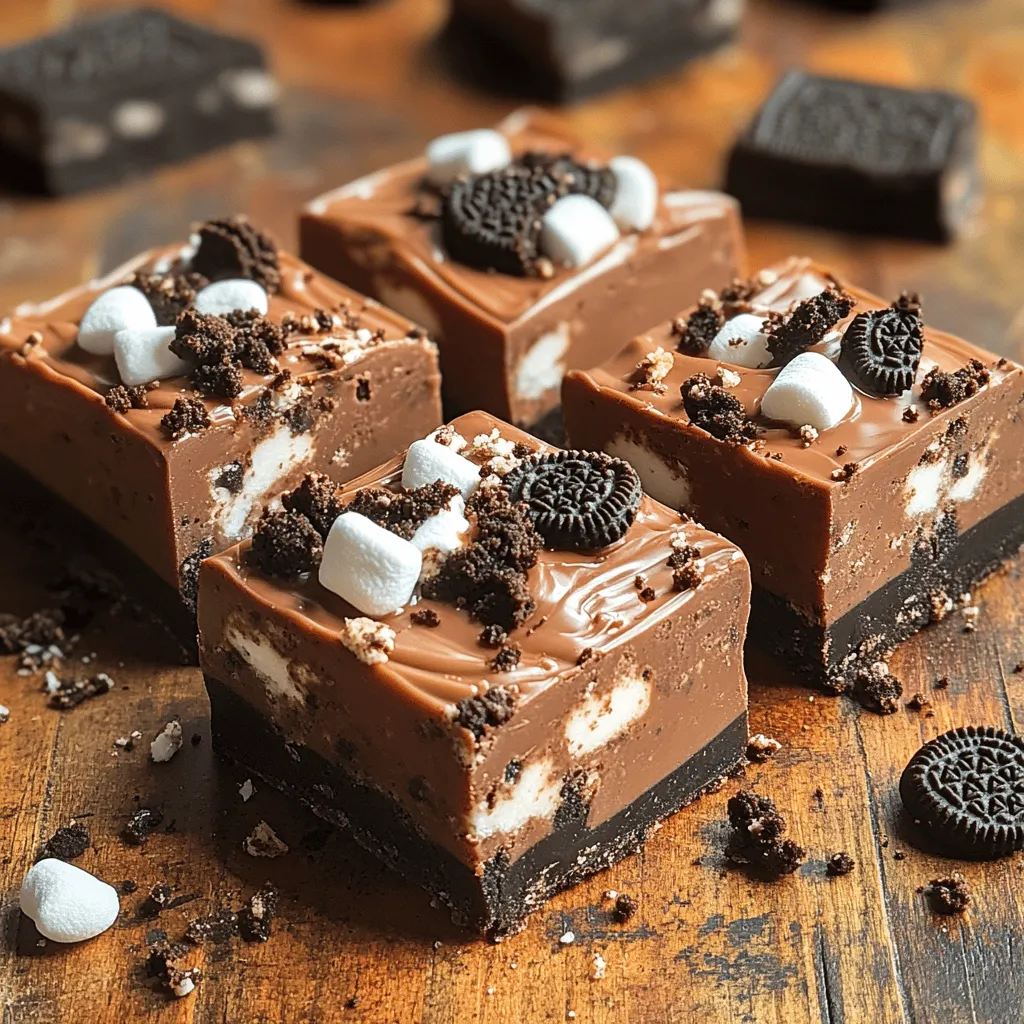
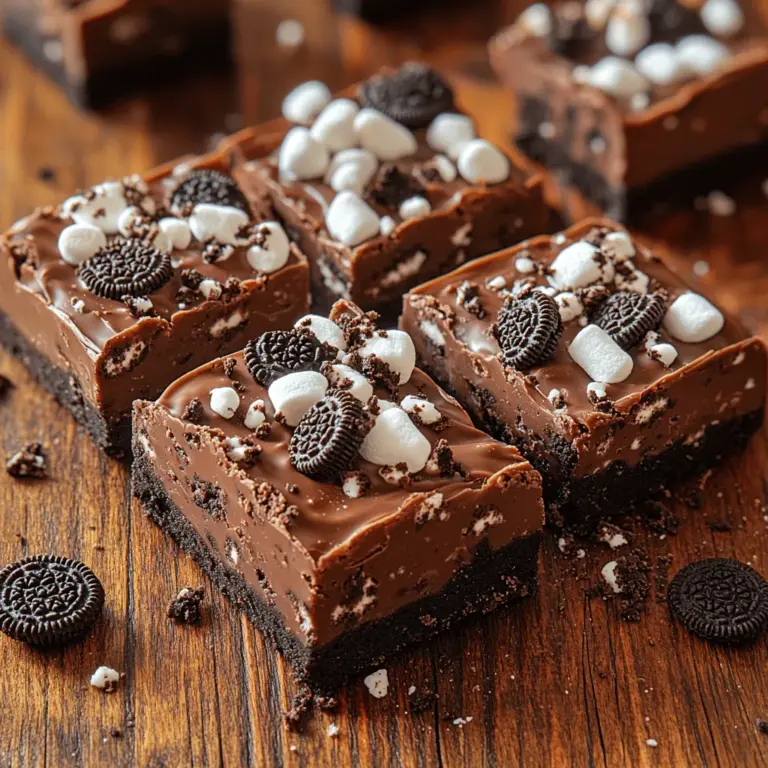
If you’re in search of a dessert that marries the rich, creamy texture of fudge with the delightful crunch of Oreos, look no further than Decadent Oreo Fudge Squares. This indulgent treat is not only visually appealing but is also a crowd-pleaser at parties, family gatherings, or even as a special weekend treat. Its origins can be traced back to the classic American dessert scene where fudge has been a staple, celebrated for its velvety richness and the ability to incorporate various flavors and textures.
In this article, you will embark on a culinary journey to create your own batch of Oreo Fudge Squares. We will delve into the intricacies of the ingredients, highlighting the importance of quality in your selections. You will discover how each component contributes to the overall taste and texture of the dish. Furthermore, we will guide you through the preparation steps, ensuring that you have all the right tools and techniques to achieve the perfect fudge squares. Whether you are a novice baker or an experienced chef, this recipe will equip you with the knowledge to impress anyone with your dessert-making skills.
Understanding the Ingredients
Creating the perfect Decadent Oreo Fudge Squares begins with understanding the key ingredients that make this treat so special. Each element plays a crucial role in defining the final product, so let’s take a closer look at what you’ll need.
Overview of Main Ingredients
The primary ingredients for this recipe include:
– Oreo Cookies: The star of the show, these beloved chocolate sandwich cookies bring a delightful crunch and a hint of creaminess to the fudge.
– Sweetened Condensed Milk: This ingredient is essential for giving the fudge its characteristic sweetness and creamy texture. It acts as a binder, allowing the fudge to set properly.
– Semi-Sweet Chocolate Chips: The chocolate chips are melted down to form the base of the fudge. The semi-sweet variety strikes the perfect balance between sweetness and rich chocolate flavor.
– Butter: Adding butter enhances the creaminess and provides a luxurious mouthfeel to the fudge.
– Vanilla Extract: A splash of vanilla extract elevates the flavor profile, adding depth to the chocolate and Oreo combination.
Fresh Produce and Their Benefits
While this recipe primarily focuses on pantry staples, incorporating fresh ingredients can elevate your dessert even further. For example, consider adding a sprinkle of sea salt or a dash of espresso powder to deepen the chocolate flavor. Fresh herbs like mint can also be used as a garnish to add a refreshing contrast to the rich fudge.
Importance of Quality in Ingredients
When it comes to making Decadent Oreo Fudge Squares, the quality of your ingredients can significantly affect the outcome. Opting for high-quality chocolate chips and fresh Oreo cookies will yield a richer and more satisfying dessert. Look for chocolate chips with a higher cocoa content for a more intense chocolate flavor. Additionally, using name-brand Oreo cookies will ensure that you get the right texture and taste that complements the fudge perfectly.
Spices and Seasonings
Although this recipe doesn’t call for many spices, the addition of a few carefully selected seasonings can enhance the overall flavor. For instance, a pinch of sea salt can balance the sweetness of the fudge, while a dash of espresso powder can intensify the chocolatey notes.
Tips for Selecting the Right Spices
1. Freshness: Always check the expiration date on your spices. Fresh spices yield better flavor and aroma.
2. Source: Purchase spices from reputable sources to ensure quality and potency.
3. Storage: Store spices in a cool, dark place to preserve their flavor.
Preparation Steps
Before diving into the cooking process, it’s crucial to prepare your ingredients properly. This step sets the stage for a smooth baking experience and ensures that you achieve the best results.
Detailed Preparation of Ingredients
1. Crush the Oreos: Begin by taking your Oreo cookies and placing them in a resealable plastic bag. Use a rolling pin to crush them into fine crumbs. Alternatively, you can use a food processor for a quicker method. Set aside a portion of the crumbs for topping the fudge later.
2. Measure Out Ingredients: Accurately measure out your sweetened condensed milk, semi-sweet chocolate chips, butter, and vanilla extract. Having everything ready will streamline the cooking process.
3. Prepare Your Work Surface: Ensure your kitchen workspace is clean and organized. Lay out all your ingredients and tools so that you can easily access them during preparation.
Washing and Chopping Vegetables
While this recipe does not require any vegetables, if you were to incorporate a side dish or garnish involving fresh produce, remember the following:
– Washing: Always wash fruits and vegetables thoroughly under running water to remove any dirt or pesticide residues.
– Chopping: Use a sharp knife and a cutting board to chop vegetables. For garnishes, ensure even cuts for an appealing presentation.
Tools and Equipment Needed
To create Decadent Oreo Fudge Squares, you’ll need a few essential kitchen tools:
– Mixing Bowls: Various sizes for mixing ingredients.
– Double Boiler or Microwave-Safe Bowl: For melting chocolate and butter together.
– Spatula: A silicone spatula is ideal for folding ingredients and scraping down the sides of bowls.
– 9×9-inch Baking Pan: This is the recommended size for perfect fudge thickness.
– Parchment Paper: Line your baking pan with parchment paper for easy removal of the fudge once set.
Essential Kitchen Tools
Investing in good-quality kitchen tools can make a significant difference in your baking experience. Here are some recommended items:
– Silicone Spatula: For smooth mixing and folding.
– Measuring Cups and Spoons: Accurate measurements are crucial for successful baking.
– Food Processor: A versatile tool that can save time when crushing cookies or mixing ingredients.
Recommended Cookware for Optimal Results
A heavy-bottomed saucepan or a good-quality double boiler is ideal for melting chocolate and butter over low heat. This prevents the chocolate from burning and ensures a smooth, creamy consistency. If using a microwave, be sure to microwave in short intervals and stir frequently to avoid overheating.
Cooking Techniques
Now that you have all your ingredients prepared and tools at the ready, it’s time to learn the step-by-step process for creating your Decadent Oreo Fudge Squares.
1. Melt the Chocolate and Butter: In a double boiler, combine the semi-sweet chocolate chips and butter. Stir occasionally until melted and smooth. If using a microwave, heat in 30-second intervals, stirring after each until fully melted.
2. Combine Ingredients: Once the chocolate and butter mixture is smooth, remove it from heat. Stir in the sweetened condensed milk and vanilla extract until fully incorporated.
3. Fold in Crushed Oreos: Gently fold in the crushed Oreos until they are evenly distributed throughout the fudge mixture. This step is crucial for achieving that signature Oreo flavor in every bite.
4. Pour into Baking Pan: Transfer the fudge mixture into the lined 9×9-inch baking pan. Use a spatula to spread it evenly and smooth the top.
5. Chill the Fudge: Refrigerate the fudge for at least 2-3 hours or until it is firm enough to cut into squares. The chilling process allows the fudge to set properly, resulting in a perfect texture.
By following these preparation steps and understanding the significance of each ingredient, you are well on your way to creating delicious Decadent Oreo Fudge Squares that will have everyone asking for seconds. Keep an eye out for the next section, where we will explore more detailed cooking techniques and tips to ensure your fudge turns out perfectly every time.

Cooking Methods Used in Oreo Fudge Squares
The preparation of decadent Oreo fudge squares utilizes several key cooking methods that contribute to their rich flavor and luxurious texture. Understanding these methods will enhance your cooking experience and help you replicate this indulgent treat perfectly.
1. Melting: Melting chocolate is a critical step in this recipe. It’s important to use a double boiler or microwave to gently melt the chocolate without burning it. The goal is to achieve a smooth and glossy consistency, which provides the base for the fudge. If using a microwave, melt in short bursts of 15-20 seconds, stirring in between until fully melted.
2. Mixing: Once the chocolate is melted, mixing is vital for combining the ingredients evenly. Use a rubber spatula or wooden spoon to incorporate the sweetened condensed milk and crushed Oreos into the melted chocolate. Proper mixing ensures that every bite is packed with flavor.
3. Setting: Setting the fudge is a crucial step, as it determines the final texture. By refrigerating the mixture, you allow the fudge to firm up adequately. This step is essential to achieve that perfect, creamy bite without it falling apart when cut.
4. Chilling: Chilling not only helps the fudge to set but enhances the flavors as they meld together. Allowing the fudge to chill for at least two hours ensures that it hardens sufficiently for clean cuts.
Tips for Achieving the Best Texture and Flavor
To ensure your Oreo fudge squares turn out perfectly, consider the following tips:
– Use Quality Ingredients: The type of chocolate you use significantly impacts the flavor. Opt for high-quality chocolate chips or bars for the best results. Dark chocolate provides a rich flavor that balances the sweetness of the Oreos.
– Crush Oreos Properly: For the best texture, crush the Oreos into fine crumbs, but leave some larger chunks for added texture. You can use a food processor for a finer crumb or place them in a zip-top bag and crush them with a rolling pin.
– Don’t Overheat the Chocolate: Be cautious when melting chocolate, as overheating can cause it to seize. If your chocolate looks grainy or clumpy, it may be too hot. If this happens, add a small splash of vegetable oil or milk to help smooth it out.
– Use a Lined Pan: Lining your baking pan with parchment paper allows for easy removal of the fudge once it’s set. Leave some overhang to help lift the fudge out of the pan.
Common Mistakes to Avoid
Avoid these common pitfalls to ensure your Oreo fudge squares are a hit:
– Not Allowing Enough Chill Time: Be patient and allow the fudge to chill adequately. Cutting it too early can result in a messy, gooey treat. Aim for at least two hours in the refrigerator.
– Using Low-Quality Chocolate: While it may be tempting to save money, using low-quality chocolate can lead to a less satisfying flavor. Invest in good chocolate for the best results.
– Ignoring Measurements: Baking is a science, and accurate measurements are crucial. Use measuring cups and spoons to ensure you’re adding the right amounts of each ingredient.
Importance of Timing and Temperature
Timing and temperature are essential when making Oreo fudge squares:
– Melting Temperature: When melting chocolate, aim for a temperature below 120°F (49°C) to prevent burning. Always stir frequently to evenly distribute heat.
– Chilling Time: Allow the fudge to chill for a minimum of two hours. If planning to serve later, consider leaving it in the refrigerator longer to ensure it maintains its shape.
– Serving Temperature: For the best texture, serve the fudge squares at room temperature. Allow them to sit out for about 10-15 minutes after removing them from the fridge.
Serving Suggestions
When it comes to serving your Oreo fudge squares, presentation and pairing can elevate your dessert experience:
– Ideal Serving Temperature: For the best taste and texture, serve your fudge squares slightly warmed or at room temperature. This allows the chocolate to soften slightly, making each bite more enjoyable.
– Presentation Tips: Cut the fudge into neat squares and arrange them on a decorative platter. You can garnish with additional crushed Oreos or drizzle with chocolate sauce for an appealing look. A dusting of powdered sugar can also add a touch of elegance.
– Pairing Suggestions: These fudge squares pair wonderfully with a glass of cold milk or a scoop of vanilla ice cream. For a more grown-up pairing, consider serving them with a rich coffee or a dessert wine like Port.
Nutritional Information
Understanding the nutritional aspects of your Oreo fudge squares can help you enjoy them mindfully:
– Calories and Macronutrients: Each square contains approximately 150-200 calories, depending on the size and specific ingredients used. The fudge is rich in fats from the chocolate and cream, with carbohydrates primarily coming from the Oreos.
– Health Benefits of Main Ingredients: While indulgent, dark chocolate contains antioxidants and may offer health benefits when consumed in moderation. Oreos, while a treat, provide a nostalgic enjoyment that makes these fudge squares even more appealing.
– Dietary Considerations: For those with dietary restrictions, consider using gluten-free Oreos and dairy-free chocolate to make these fudge squares suitable for various diets. Be sure to check labels for any allergens.
Cultural Significance
The Oreo fudge square, while not a traditional dish in any specific culture, embodies the global love for chocolate and cookies:
– Historical Background: The Oreo cookie was introduced in the United States in 1912, quickly becoming a beloved snack. This recipe capitalizes on the nostalgia associated with Oreos, turning them into a decadent dessert.
– Variations Across Cultures: Many cultures have their own versions of chocolate fudge, often incorporating local ingredients. For example, in some Latin American countries, dulce de leche is used to create a similar treat, highlighting the universal appeal of fudge-like desserts.
– Personal Anecdotes: Many home bakers have fond memories associated with making desserts for family gatherings or special occasions. The Oreo fudge square often brings people together, whether through shared recipes or festive celebrations.
Conclusion
In conclusion, the Oreo fudge squares are a delightful treat that combines the rich flavors of chocolate with the iconic taste of Oreos. Their appeal lies not only in their taste but also in their ability to evoke memories and create new ones. By following the detailed instructions and tips provided, you can master this recipe and impress friends and family alike.
We encourage you to try making these decadent squares at home. The joy of cooking and sharing food with loved ones is unparalleled, and this recipe is a perfect way to bring a little sweetness into your life. Whether enjoyed as an everyday treat or a special occasion dessert, Oreo fudge squares are sure to become a favorite in your kitchen. Happy baking!

