Introduction to Decadent Chocolate Hazelnut Mousse Cups
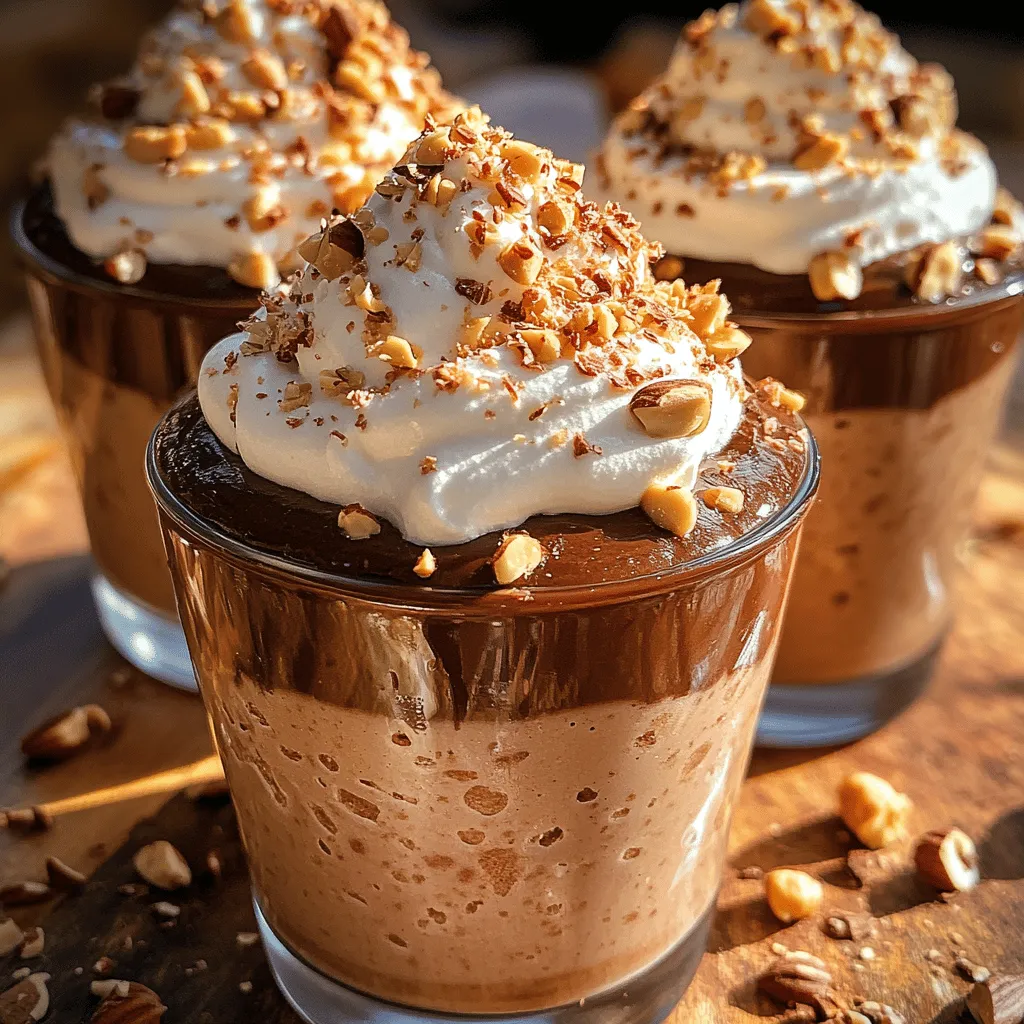
If you’re on the hunt for a dessert that embodies luxury and indulgence, look no further than our Decadent Chocolate Hazelnut Mousse Cups. This rich and creamy delight marries the deep, intense flavors of dark chocolate with the sweet, nutty essence of hazelnuts. The result? A dessert that not only satisfies your sweet tooth but also leaves a lasting impression on your guests. Perfect for any occasion—be it a sophisticated dinner party, a casual gathering, or simply a well-deserved treat at home—these mousse cups are a showstopper in their own right.
The allure of chocolate is universal, and when paired with the unique flavor profile of hazelnuts, it creates an exquisite taste experience that is hard to resist. Imagine a silky mousse that melts in your mouth, accompanied by the crunch of hazelnuts on top. Each spoonful is a delightful journey of flavor and texture, making these mousse cups a must-try for any chocolate lover.
In this article, we will take you through the entire process of creating these delectable mousse cups, from understanding the ingredients to detailed step-by-step instructions. Whether you’re a seasoned baker or a cooking novice, our guide will equip you with everything you need to achieve the perfect mousse texture and presentation.
Understanding the Ingredients
Exploring Dark Chocolate and Its Benefits
Dark chocolate is the star of this recipe, and its quality can make or break your mousse. When selecting dark chocolate, pay attention to the cocoa percentage. Generally, chocolate with a cocoa content of 70% or higher provides an intense flavor and rich texture that elevates your dessert. Higher cocoa percentages mean less sugar, resulting in a more robust chocolate taste that pairs beautifully with the sweetness of hazelnut.
Beyond its flavor, dark chocolate offers several health benefits. Rich in antioxidants, it may improve heart health, enhance brain function, and even elevate mood. Incorporating dark chocolate into your diet in moderation can be both a delicious treat and a healthy indulgence.
When choosing dark chocolate for your mousse, opt for high-quality brands known for their rich taste and smooth melting properties. Brands like Valrhona, Callebaut, and Ghirardelli are excellent choices, providing a depth of flavor that will shine through in your mousse.
The Role of Hazelnut Spread
Hazelnut spread is another key ingredient in our mousse cups, bringing a creamy texture and unique flavor that complements the chocolate beautifully. The most popular hazelnut spread, Nutella, is beloved for its luscious consistency and sweet, nutty flavor. However, if you’re looking for alternatives, there are many options available, including brands that use organic ingredients or cater to those with dietary restrictions.
The inclusion of hazelnut spread not only enhances the flavor profile but also contributes to the mousse’s overall texture, lending it a richness that balances the bitterness of dark chocolate. For those who cannot consume traditional hazelnut spreads due to allergies or dietary preferences, consider using homemade hazelnut butter or sunflower seed butter as a substitute. These alternatives can provide a similar nutty flavor while accommodating various dietary needs.
The Essential Components of Mousse
Creating a flawless mousse requires a few essential components, each playing a critical role in achieving the desired texture and taste. The first ingredient to highlight is heavy whipping cream. This ingredient is crucial for incorporating air into your mousse, resulting in a light and airy texture. Heavy cream has a high-fat content, which allows it to whip up beautifully and maintain its structure once incorporated into the chocolate mixture.
Sugar and vanilla are also essential in enhancing the flavors in your mousse. Sugar balances the bitterness of the dark chocolate, while vanilla adds an aromatic sweetness that rounds out the overall flavor profile. For the best results, use pure vanilla extract instead of imitation vanilla, as the latter may not provide the same depth of flavor.
Finally, butter is an important ingredient that contributes to the silky, smooth texture of the mousse. When melted and combined with the chocolate, it creates a rich base that binds the ingredients together and adds a luxurious mouthfeel. Using unsalted butter allows you to control the saltiness of your dessert, ensuring that the flavors of chocolate and hazelnuts take center stage.
Step-by-Step Guide to Making Chocolate Hazelnut Mousse Cups
Melt the Chocolate
The first step in creating your Decadent Chocolate Hazelnut Mousse Cups is to melt the dark chocolate. This process requires careful attention to ensure that the chocolate melts evenly without seizing. The double boiler method is the most effective technique for melting chocolate, as it allows for gentle heating and minimizes the risk of overheating.
To set up a double boiler, fill a medium saucepan with a few inches of water and bring it to a simmer. Place a heatproof bowl on top of the saucepan, making sure that the bottom of the bowl does not touch the water. Add your chopped dark chocolate to the bowl, stirring occasionally as it melts. This method helps distribute heat evenly, preventing hot spots that can cause the chocolate to seize.
While melting the chocolate, it’s crucial to monitor the temperature closely. Ideally, you want to melt the chocolate until it reaches about 115°F (46°C). If you notice the chocolate beginning to seize or clump, remove the bowl from the heat immediately and continue stirring until smooth. Once melted, let the chocolate cool slightly before incorporating it into the mousse mixture. This step is essential, as adding hot chocolate to cold cream can lead to undesirable results.
Whip the Cream for Perfect Texture
While your chocolate cools, it’s time to whip the heavy cream. Achieving the perfect whipped cream is a critical step in creating a light and airy mousse. Start by placing your mixing bowl and beaters in the refrigerator for about 10-15 minutes before you begin. Chilled equipment helps the cream whip up faster and increases its volume.
Once your equipment is chilled, pour the heavy whipping cream into the bowl. Begin mixing on low speed to avoid splattering, gradually increasing to medium speed. After about a minute, add in sugar and a pinch of salt to enhance flavor and balance the sweetness. Continue whipping until you reach medium peaks, which means that the cream should hold its shape but still be soft and slightly droopy.
Be cautious not to over-whip the cream, as this can lead to a grainy texture and even butter if taken too far. When you lift the beaters out of the cream, the peaks should gently curl over at the tips. This stage is ideal for folding into your chocolate mixture, as it will provide the mousse with the perfect lightness.
Combine Mixtures for Optimal Flavor
With your chocolate melted and cooled, and your cream whipped to perfection, it’s time to combine the two mixtures. Start by adding a small amount of the whipped cream to the melted chocolate to lighten it. This technique helps to temper the chocolate, making it easier to incorporate the rest of the whipped cream without deflating it.
Gently fold the lightened chocolate mixture back into the remaining whipped cream using a spatula. The folding technique is key here; use a gentle motion to combine the ingredients, scraping the sides and bottom of the bowl to ensure everything is well mixed. Be careful not to overmix, as you want to retain as much air as possible for a fluffy mousse.
Once the two mixtures are combined, you can taste your mousse and adjust flavors if needed. If you desire a sweeter mousse, you can add a touch more sugar or even a splash of vanilla extract for extra depth. Once satisfied with the flavor, your mousse is ready to be transferred into cups for chilling.
In the next part of this article, we will cover how to present your mousse cups beautifully and explore some tips for ensuring they turn out perfectly every time.

Techniques for Folding to Preserve Airiness
When it comes to creating the perfect chocolate hazelnut mousse, the technique of folding is crucial in maintaining the light and airy texture that defines this dessert. Folding is a gentle mixing method that allows you to combine ingredients without deflating the air bubbles that have been incorporated into the whipped cream or egg whites. To achieve the best results, follow these steps:
1. Use a Rubber Spatula: Opt for a flexible rubber spatula that can easily scrape the sides and bottom of your bowl. This tool allows for more control when folding the ingredients together.
2. Cut and Fold Motion: Instead of stirring vigorously, use a cut and fold motion. Start by adding a small amount of the lighter mixture (like whipped cream) into the heavier chocolate mixture. Gently cut through the center of the mixtures with the spatula, then lift the spatula and fold it over the top. Rotate the bowl a quarter turn and repeat until just combined. It’s important not to overmix as this can lead to a denser mousse.
3. Visual Cues: Look for visual cues to know when your mixtures are ready to combine. The whipped cream should appear fluffy and hold soft peaks, while the chocolate mixture should be smooth and glossy. When both elements are mixed together, the mousse should have a uniform color with no streaks of either chocolate or cream remaining.
Incorporate Hazelnut Spread Smoothly
Integrating hazelnut spread into your mousse can enhance the flavor profile, but it requires a careful approach to ensure a smooth consistency.
1. Temperature Matters: Begin by slightly warming the hazelnut spread to make it more pliable. You can do this by placing the jar in a bowl of warm water for a few minutes or microwaving it for about 10 seconds. This will help it blend seamlessly with the chocolate.
2. Mixing: When you’re ready to incorporate the hazelnut spread, add a small dollop into the chocolate mixture first. Use your spatula to blend it in thoroughly before adding the whipped cream. This initial step helps to create a smoother base for folding in the whipped cream.
3. Folding Technique: Once the hazelnut spread is mixed into the chocolate, proceed with the gentle folding method outlined earlier. Be careful to maintain the mousse’s lightness while ensuring that the hazelnut flavor is evenly distributed throughout the mixture.
Incorporating Whipped Cream
The whipped cream is a key component of the mousse, providing that luxurious lightness that makes it melt in your mouth.
1. Importance of Folding Gently: As you incorporate the whipped cream, the key is to be gentle. The goal is to keep the air that was whipped into the cream; this is what gives the mousse its airy texture. Avoid vigorous stirring which can deflate the cream.
2. Maintaining Mousse Lightness: When mixing the whipped cream with the chocolate mixture, always start with a small amount of whipped cream. This “lightens” the chocolate base and makes it easier to incorporate the rest of the whipped cream without losing too much air.
3. Potential Pitfalls: One of the most common mistakes is overmixing the mousse, which can lead to a dense texture. Be mindful of the consistency as you fold, and stop as soon as you see no streaks of cream.
Add Chopped Hazelnuts for Texture
Incorporating chopped hazelnuts into your mousse not only enhances the flavor but also adds a delightful texture.
1. Benefits of Incorporating Nuts: Nuts bring a crunchy contrast to the velvety mousse, creating a more dynamic dessert. The roasted hazelnuts will also intensify the nutty flavor, complementing the chocolate beautifully.
2. Even Distribution: To ensure an even distribution of hazelnuts, chop them into small, uniform pieces. This makes it easier to fold them into the mousse without clumping. Add the chopped hazelnuts in the final stages of folding, just before you’re ready to portion out the mousse.
3. Variation Suggestions: While hazelnuts are a classic pairing with chocolate, feel free to experiment with other nuts. Chopped almonds, pecans, or walnuts can also work well, each bringing a unique flavor and texture to your mousse.
Chill the Mousse to Perfection
The chilling process is essential for achieving the right texture and setting your mousse.
1. Chilling Time Importance: Typically, you should chill the mousse for at least 2-4 hours, or overnight if possible. This allows the flavors to meld and the mousse to set properly, resulting in a firmer texture that holds its shape when served.
2. Temperature Effects: The temperature of your mousse before chilling can affect the final outcome. If the mousse mixture is too warm when placed in the refrigerator, it may not set properly, leading to a runny consistency.
3. Best Practices for Storing Mousse Cups: Once your mousse is portioned into serving cups, cover each cup with plastic wrap or a tight-fitting lid to prevent any absorption of odors from the refrigerator. If you’re planning to store the mousse for longer than a day, consider freezing it, but remember to allow it to thaw in the refrigerator for a few hours before serving.
Presentation and Garnishing Techniques
The way you present your chocolate hazelnut mousse cups can greatly enhance the overall experience.
Choosing the Right Serving Glasses
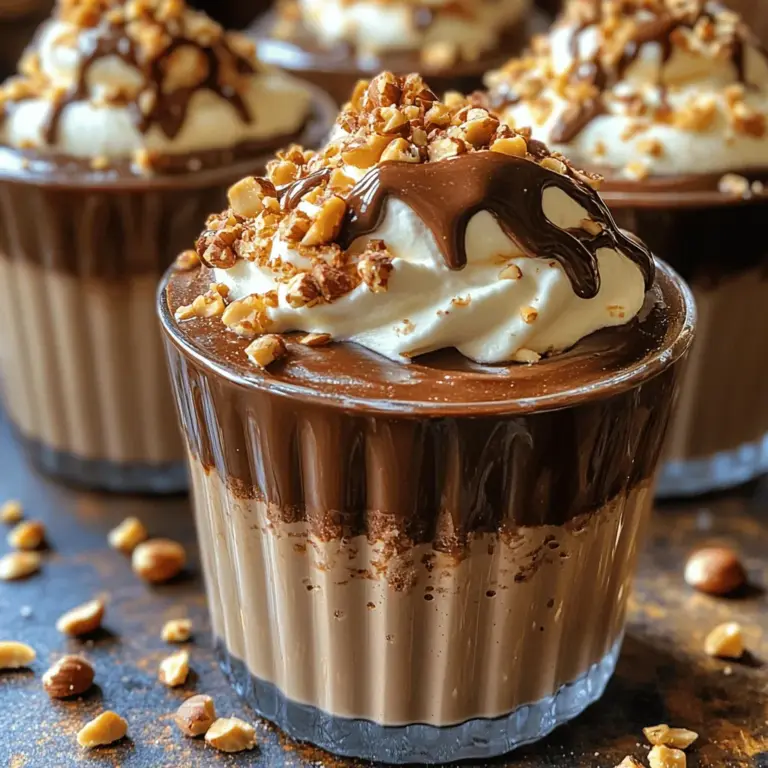
1. Serving Options: The choice of serving glass can add an element of sophistication to your mousse. Consider using clear glass dessert cups, mason jars, or even elegant shot glasses. The transparency allows the beautiful layers of chocolate and hazelnut to be showcased.
2. Aesthetic Appeal: A well-chosen glass not only enhances the visual appeal but also complements the richness of the mousse. Opt for glasses that are not too large, as this dessert is rich and a little goes a long way.
Garnishing for Visual Appeal and Flavor
1. Creative Topping Ideas: Garnish your mousse with a dollop of freshly whipped cream, a sprinkle of chopped hazelnuts, or even a dusting of cocoa powder. These elements not only add visual flair but also enhance the flavor profile.
2. Importance of Presentation: The presentation is crucial in elevating a simple dessert into a gourmet experience. Consider adding a sprig of mint or a few edible flowers for a pop of color.
3. Drizzling Hazelnut Spread: For an extra touch, drizzle some warmed hazelnut spread over the top just before serving. This not only adds a visual element but also a burst of flavor that ties the entire dessert together.
Conclusion: The Joy of Homemade Chocolate Hazelnut Mousse Cups
Creating your own Decadent Chocolate Hazelnut Mousse Cups at home is not just about satisfying a sweet tooth; it’s about experiencing the joy of crafting something exquisite. With rich chocolate and the unmistakable flavor of hazelnuts, this dessert is sure to impress anyone who tastes it.
By following this comprehensive guide, you can master the techniques of folding, incorporating flavors, and presenting your mousse beautifully. Each step, from ensuring the right texture to the final garnishing touches, contributes to an indulgent experience that will leave your guests raving.
So, embrace the joy of making this luxurious treat, and take the time to savor every creamy spoonful. Whether it’s for a special occasion or a delightful weeknight treat, these chocolate hazelnut mousse cups are bound to become a favorite in your dessert repertoire. Enjoy the sweet satisfaction of homemade elegance, and let each bite transport you to a world of chocolatey bliss.

