Indulge in the Sweetness: Chocolatey Campfire Delight S’mores Bars Recipe
Introduction
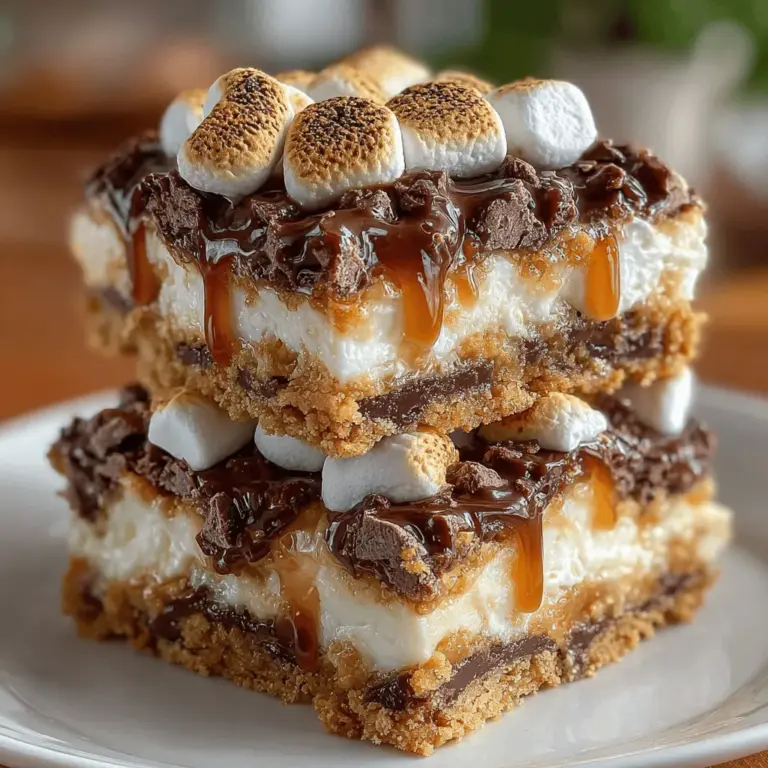
There’s something inherently magical about gathering around a campfire, the air filled with laughter, stories, and the tantalizing aroma of roasting marshmallows. The quintessential campfire treat, s’mores, has earned its place as a beloved symbol of outdoor adventures and childhood nostalgia. For many, nothing quite compares to the experience of skewering a marshmallow, watching it transform into a gooey delight over the flames, then sandwiching it between two graham crackers with a piece of chocolate. However, for those nights when the campfire isn’t an option or when you’re looking to serve a crowd, the Chocolatey Campfire Delight S’mores Bars offer a delightful alternative.
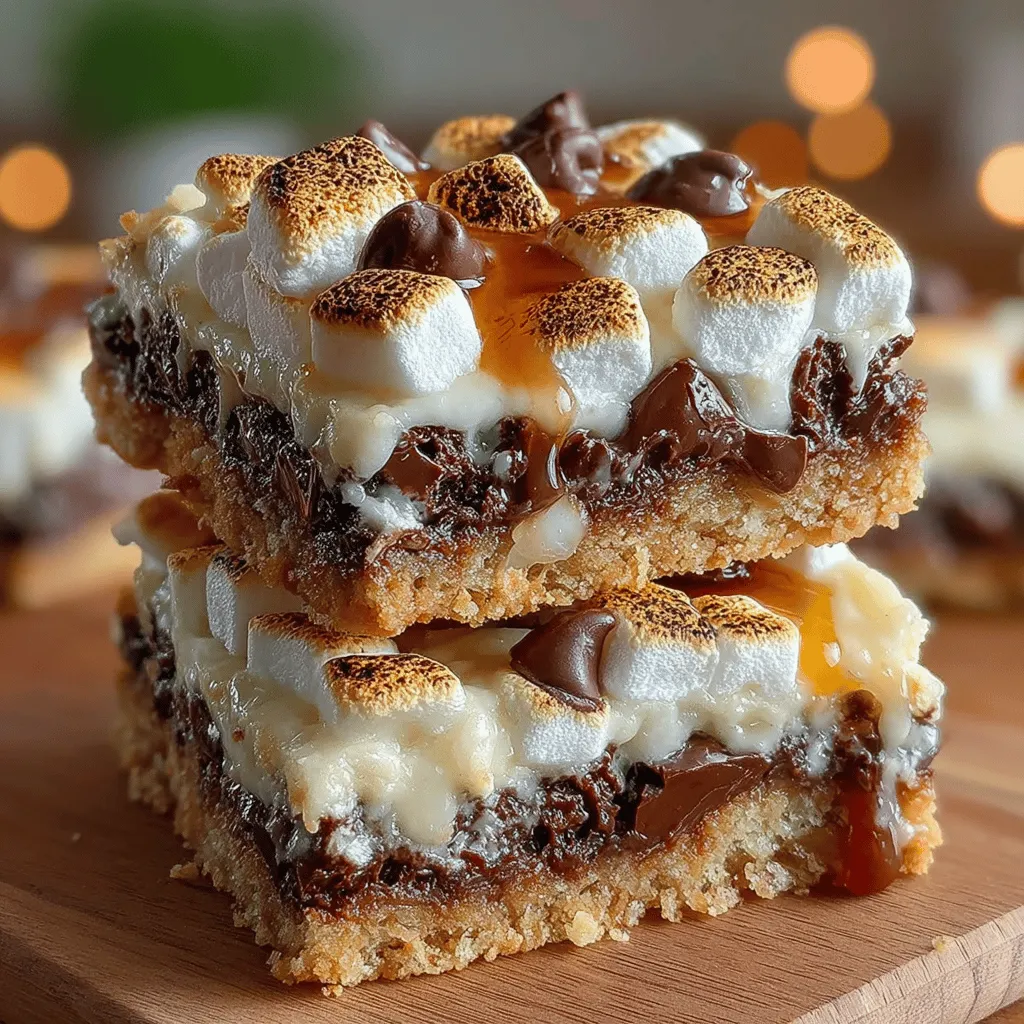
These bars encapsulate the essence of traditional s’mores in an easy-to-make dessert that is perfect for gatherings, parties, or cozy family nights at home. With layers of rich chocolate, crunchy graham cracker crust, and fluffy marshmallows, they present a harmonious blend of flavors and textures that will have everyone reaching for seconds. Whether you’re a lifelong s’mores enthusiast or new to this classic treat, these bars promise to bring joy and sweetness to any occasion.
The Allure of S’mores
S’mores have a rich history that dates back to the early 20th century, with the first recorded recipe appearing in a Girl Scouts manual in 1927. The name itself is a contraction of “some more,” a fitting title for a treat that many find irresistible. Over the decades, s’mores have become deeply embedded in American culture, symbolizing campfire gatherings and summer escapades. They evoke memories of warm evenings spent outdoors, surrounded by friends and family, where stories were shared, laughter echoed, and the simple pleasure of a sweet treat created lasting memories.
The enduring appeal of s’mores lies not only in their taste but also in the experiences they foster. They are more than just a dessert; they represent a connection to nature, childhood innocence, and the joy of sharing. This cultural significance makes any s’mores-inspired recipe, like our Chocolatey Campfire Delight S’mores Bars, a hit among both adults and children alike, bridging generations with each gooey bite.
Ingredients Overview
Before diving into the preparation of these delectable bars, let’s take a closer look at the ingredients that come together to create this mouthwatering treat. Each component plays a crucial role in achieving the perfect balance of flavor and texture.
– Graham Cracker Crumbs: The foundation of our bars begins with graham cracker crumbs, which provide a crunchy texture and a subtly sweet, honey-like flavor that is classic to s’mores. The crumbs form the crust that holds everything together while delivering that essential crunch.
– Unsalted Butter: This rich ingredient is key to binding the crust and adding a velvety mouthfeel. The butter melts into the graham cracker crumbs, creating a cohesive base that enhances the overall richness of the dessert.
– Granulated Sugar: Sugar is essential for enhancing the sweetness of the bars. It not only sweetens the crust but also works to balance out the chocolate and marshmallows, ensuring that each bite is perfectly indulgent without being overwhelmingly sweet.
– Chocolate Chips and Milk Chocolate Bars: The star ingredients of our s’mores bars, chocolate chips, and milk chocolate bars create a luscious layer of decadence. As they melt, they offer a rich, chocolatey flavor that pairs beautifully with the marshmallows and graham crust, delivering that classic s’mores taste.
– Mini Marshmallows: These tiny puffs of sweetness contribute to the iconic gooey texture of s’mores. When baked, mini marshmallows become delightfully soft and slightly toasted, adding a depth of flavor that encapsulates the campfire experience.
– Vanilla Extract: A splash of vanilla extract enhances the flavor profile, adding warmth and complexity to the bars. It complements the chocolate and marshmallows, rounding out the overall taste.
– Pinch of Salt: A small dash of salt is crucial for balancing the sweetness of the bars. Salt enhances the flavors, elevating the chocolate and making the dessert even more satisfying.
Step-by-Step Instructions
Now that we have a solid understanding of our ingredients, let’s delve into the step-by-step process of making these Chocolatey Campfire Delight S’mores Bars. This guide will ensure clarity and ease, allowing you to replicate this delightful dessert without any hassle.
Preparing the Oven: The first step in making your s’mores bars is to preheat your oven to 350°F (175°C). Preheating is essential as it ensures that your bars bake evenly from the start. While the oven is warming up, take the time to prepare your baking pan. Line an 8×8-inch square baking pan with parchment paper, leaving some overhang on the sides. This will make it easier to lift the bars out later for cutting and serving. If you prefer, you can lightly grease the pan with cooking spray or butter to further prevent sticking.
With the oven preheated and the pan ready, you’ll be well on your way to creating a dessert that captures the essence of campfire s’mores in a luscious, easy-to-share bar format. The following steps will guide you through the remainder of the preparation, allowing you to bring this delicious treat to life.
Stay tuned for the next part, where we’ll explore the process of crafting the crust, layering in the chocolate, and topping it with those irresistible mini marshmallows.
Creating the Crust
To achieve the perfect crust for your Chocolatey Campfire Delight S’mores Bars, start by preheating your oven to 350°F (175°C). In a large mixing bowl, combine 2 cups of graham cracker crumbs, ½ cup of granulated sugar, and 1 cup of melted unsalted butter. Ensure the butter is slightly cooled to avoid cooking the sugar. Mix the ingredients well until the graham cracker crumbs are fully coated with butter and the mixture resembles wet sand.
Next, transfer the crust mixture into a greased 9×13-inch baking pan. Using the back of a measuring cup or your hands, firmly press the mixture into the bottom of the pan, making sure it is evenly distributed and tightly packed. This step is crucial as a well-formed crust not only holds the bars together but also provides a satisfying crunch. After pressing, place the crust in the preheated oven and bake for about 10-12 minutes, or until it turns a light golden brown. Keep an eye on it to prevent overbaking, which can lead to a dry texture.
Baking to Perfection
To know when your crust is done, look for a subtle golden hue on the edges and a firm texture when lightly pressed. Remember, the crust will continue cooking slightly once removed from the oven, so it’s better to err on the side of underbaking. Allow the crust to cool in the pan for about 5-10 minutes before layering on the chocolate and marshmallows. This cooling period ensures that the chocolate won’t melt too quickly upon contact, allowing for a better layering effect.
Layering Chocolate
Once the crust has cooled slightly, it’s time to layer the chocolate. For this recipe, you can use 2 cups of semi-sweet chocolate chips or a combination of your favorite chocolate varieties, such as milk chocolate or dark chocolate. Evenly distribute the chocolate chips over the crust, ensuring that every corner is covered. To enhance the flavor, consider melting half of the chocolate chips in a microwave-safe bowl in 30-second intervals, stirring in between until smooth. Pour the melted chocolate over the crust and spread it out gently using a spatula. This technique allows for a rich chocolate base that melts beautifully with the marshmallows.
Marshmallow Layering
After the chocolate layer is set, it’s time to add the marshmallows. Use 3-4 cups of mini marshmallows, sprinkling them evenly over the melted chocolate. If you prefer a gooey texture, go for the higher end of this range, while fewer marshmallows will yield a more balanced flavor between the chocolate and crust. For an extra twist, you can mix in some flavored marshmallows or even toasted coconut for a tropical vibe.
Broiling for the Perfect Toast
Once the marshmallows are layered, place the pan under the broiler in your oven set to high. This is where the magic happens, turning the marshmallows into a beautifully toasted topping. However, vigilance is key during this step; broiling can go from perfectly golden to burnt in a matter of seconds. Keep the oven door slightly ajar, and watch closely as the marshmallows puff up and turn golden brown. This process should take about 1-3 minutes, depending on your oven. Once they reach your desired level of toastiness, remove the pan from the oven and allow it to cool for a few minutes.
Cooling and Cutting
To cut the bars without crumbling, let them cool completely in the pan at room temperature for at least 30 minutes. If you’re in a hurry, you can place the pan in the refrigerator for about 15-20 minutes to set the chocolate and marshmallows further. To cut the bars, use a sharp knife that has been run under hot water; this will help create cleaner cuts. For best results, cut the bars into squares or rectangles, depending on your preference. Ensure to wipe the knife clean between cuts to maintain neat edges.
The Perfect Occasion for S’mores Bars
Chocolatey Campfire Delight S’mores Bars are a versatile dessert perfect for numerous occasions. Whether you’re hosting a family gathering, throwing a birthday party, or attending a potluck, these bars will surely impress your guests. They’re also an excellent choice for cozy movie nights at home, where the nostalgia of campfire s’mores can be enjoyed year-round. The ease of serving and sharing makes them a hit for both casual get-togethers and festive celebrations, allowing everyone to indulge in deliciousness without the hassle of traditional s’mores.
Variations and Customizations
One of the best aspects of S’mores Bars is their adaptability. Consider adding a layer of peanut butter or Nutella for a richer flavor profile that complements the chocolate and marshmallows beautifully. Experiment with different types of chocolate, such as dark chocolate for a more intense flavor, white chocolate for sweetness, or even flavored chocolates like caramel or mint.
Additionally, you can incorporate mix-ins to add texture and interest. Chopped nuts, such as pecans or walnuts, can introduce a satisfying crunch, while crushed candy bars like Reese’s or Snickers can make your bars even more indulgent. Get creative with your S’mores Bars and tailor them to your personal taste for a truly unique treat.
Storing and Serving Suggestions
To keep your S’mores Bars fresh, store them in an airtight container at room temperature for up to a week. If you live in a particularly warm climate, consider refrigerating them to prevent the chocolate from melting. For serving, these bars can be enjoyed warm straight from the oven or at room temperature. For an extra indulgent experience, serve them with a scoop of vanilla ice cream or a dollop of whipped cream. The contrast between the warm, gooey bars and the cold ice cream creates a delightful combination that is sure to please.
Conclusion
In conclusion, Chocolatey Campfire Delight S’mores Bars are a delightful and easy-to-make dessert that brings the joy of campfire treats directly to your kitchen. With their rich chocolate, fluffy marshmallows, and crunchy graham cracker crust, these bars are sure to ignite childhood memories and create new ones. Embrace your inner child and enjoy this delectable dessert with friends and family, making every occasion a little sweeter. Remember, the best moments are often made around shared food, and with these S’mores Bars, you’re bound to create lasting memories filled with laughter and joy. So gather your ingredients and start crafting these delicious treats today!
