Cinnamon Roll Bliss Bars Recipe: A Perfect Sweet Treat
 Save
Save
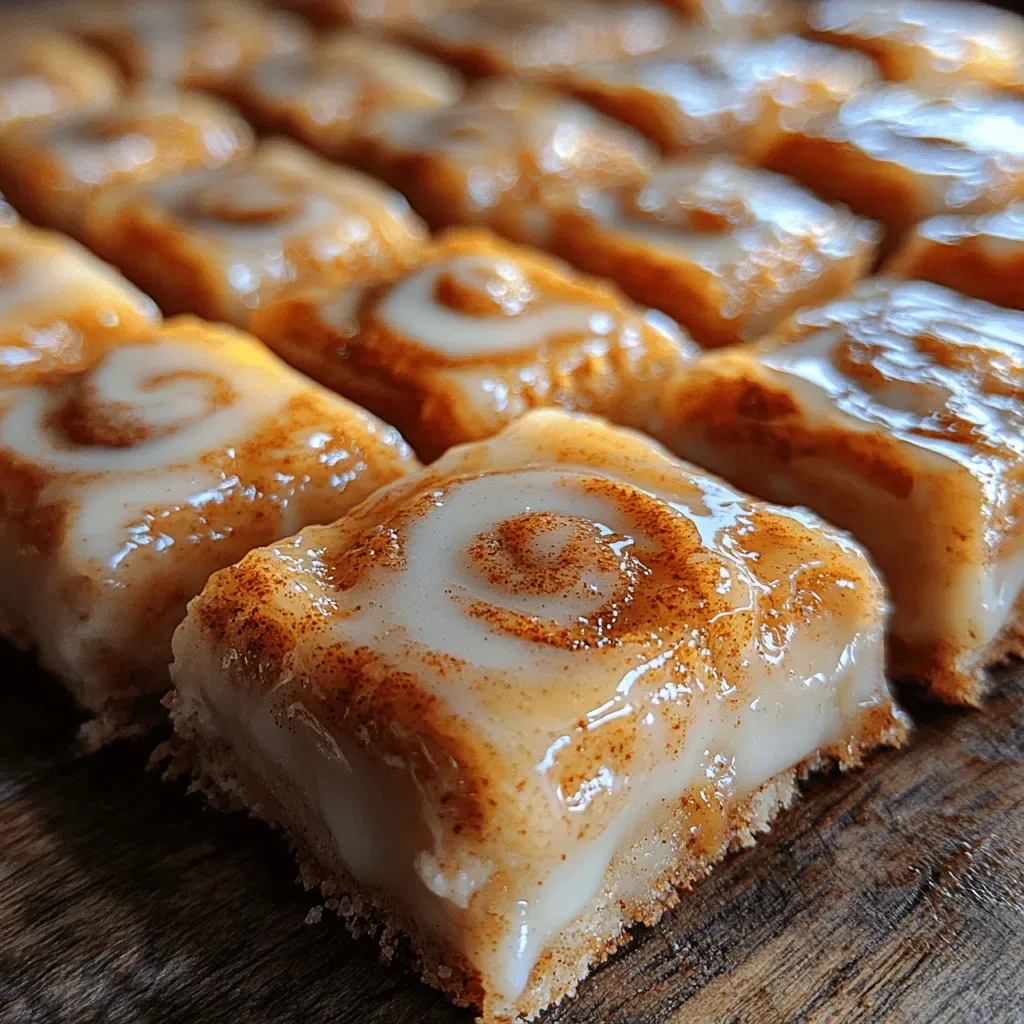
Imagine the warm, comforting aroma of freshly baked cinnamon rolls, but in a handheld, bar‑friendly form. That’s the magic of Cinnamon Roll Bliss Bars—soft, buttery dough swirled with a luscious cinnamon‑brown sugar filling, topped with a tangy cream‑cheese glaze.
What makes these bars truly special is the balance between sweet and spice, plus the slight crunch from a caramelized topping that adds texture without overwhelming the delicate crumb.
Everyone from sleepy weekend brunchers to busy parents looking for a quick dessert will fall in love with these bars. They shine at breakfast tables, coffee breaks, or as a sweet finish to dinner parties.
The process is straightforward: mix a tender dough, roll it with the spiced filling, slice into bars, bake until golden, then drizzle with a silky glaze. No fancy equipment required—just a mixing bowl, a rolling pin, and a love for cinnamon.
Why You'll Love This Recipe
Hand‑Held Convenience: Each bar is perfectly portioned, making it easy to grab on the go without sacrificing the classic cinnamon‑roll experience.
Simple Ingredients: The pantry staples—flour, butter, brown sugar, and cinnamon—mean you likely have everything on hand, keeping the grocery list short.
Versatile Serving: Serve warm with a coffee, cool as a snack, or even chilled for a firm, bite‑size treat that holds up well on a buffet.
Impressive Yet Easy: The layered look and glossy glaze give a bakery‑level appearance while the steps stay beginner‑friendly.
Tips & Tricks
Perfecting the Recipe
Temperature‑Controlled Rise: Keep the dough in a 75‑80°F environment for the first rise; a cooler room will slow the yeast and result in a denser bar.
Even Rolling: Use a rolling pin with adjustable rings or a ruler to maintain a consistent ½‑inch thickness, ensuring uniform layers of filling.
Seal the Roll: Lightly wet the seam with water before pinching; this prevents the roll from unravelling during the second rise.
Flavor Enhancements
Add a tablespoon of orange zest to the filling for a citrusy lift, or sprinkle a pinch of nutmeg for deeper spice. For extra richness, fold in ¼ cup chopped toasted pecans into the dough before the first rise.
Common Mistakes to Avoid
Never use cold butter in the filling; it won’t spread evenly and can create pockets of raw butter. Also, avoid over‑baking—the glaze will harden if the bars become too dry, losing that melt‑in‑your‑mouth quality.
Pro Tips
Use a Kitchen Scale: Weighing flour and butter yields consistent results, especially in humid kitchens.
Glaze While Warm: Drizzling the glaze over warm bars allows it to seep into the crevices, creating a glossy finish.
Cool on a Rack: Transfer the bars to a wire rack after glazing to prevent the bottom from becoming soggy.
Store in Layers: Place parchment between layers when storing to keep each bar’s surface intact.
Variations
Ingredient Swaps
Swap the classic brown sugar for coconut sugar for a subtle caramel note, or replace butter with melted coconut oil for a dairy‑free twist. Adding a handful of raisins or dried cranberries to the filling introduces a pleasant chew and bursts of tartness.
Dietary Adjustments
For a gluten‑free version, use a 1‑to‑1 gluten‑free flour blend and ensure the yeast is certified gluten‑free. To make the bars vegan, replace the egg with a “flax egg” (1 tbsp ground flaxseed + 3 tbsp water) and use plant‑based butter and cream cheese alternatives.
Serving Suggestions
Serve the bars warm with a side of vanilla Greek yogurt for a tangy contrast, or pair them with a robust cup of cold brew coffee. For brunch, top each bar with a dollop of whipped cream and a drizzle of caramel sauce.
Storage Info
Leftover Storage
Allow the bars to cool completely, then arrange them in an airtight container. Store in the refrigerator for up to four days. For longer keeping, wrap each bar tightly in plastic wrap, place in a freezer‑safe bag, and freeze for up to three months.
Reheating Instructions
Reheat refrigerated bars in a 350°F oven for 8‑10 minutes, covered with foil to retain moisture. For frozen bars, thaw overnight in the fridge, then follow the same oven method. A quick microwave (15‑20 seconds) works in a pinch, but the oven preserves the soft interior and caramelized top.
Frequently Asked Questions
Can I make these bars ahead of time?
What if I don’t have a kitchen scale?
How do I keep the glaze from cracking?
This Cinnamon Roll Bliss Bars recipe captures the classic comfort of a cinnamon roll while delivering the convenience of a handheld treat. You now have every detail—from ingredient choices to storage tricks—so you can bake with confidence. Feel free to experiment with flavor swaps or dietary tweaks; the base is forgiving and adaptable. Serve them warm, share them with friends, and enjoy every sweet, spiced bite.
Cinnamon Roll Bliss Bars Recipe: A Perfect Sweet Treat
Delicious Cinnamon Roll Bliss Bars Recipe: A Perfect Sweet Treat
Ingredients
Dough
- 3 cups all‑purpose flour
- 1 packet (2 ¼ tsp) active dry yeast
- ¼ cup granulated sugar
- ½ cup whole milk, warmed (110°F/43°C)
- ¼ cup unsalted butter, melted
- 1 large egg, lightly beaten
- ½ tsp salt
Cinnamon Filling
- ½ cup unsalted butter, softened
- 1 ⅓ cups packed light brown sugar
- 2 ½ tbsp ground cinnamon
Cream Cheese Glaze
- 4 oz cream cheese, softened
- ½ cup powdered sugar, sifted
- 1 tsp vanilla extract
- 1‑2 tbsp milk (adjust for consistency)
Instructions
First Rise & Shaping
- First Rise. Transfer the dough to a lightly oiled bowl, cover with plastic wrap, and let it rise in a warm spot for 60‑75 minutes, or until doubled in size. This step develops flavor and creates the light crumb we desire.
- Roll Out. Punch down the risen dough, then roll it on a parchment‑lined sheet pan into a rectangle about 12×9 inches. A uniform thickness (≈½‑inch) ensures even layering of the filling.
- Spread Filling. Soften ½ cup butter and blend with 1 ⅓ cups brown sugar and 2 ½ tbsp cinnamon until a smooth paste forms. Spread the mixture evenly over the dough, leaving a thin border around the edges.
Assembling the Bars
- Roll and Slice. Starting from the long side, tightly roll the dough into a log. Pinch the seam to seal. Using a sharp knife, cut the log into 12 even slices (≈1‑inch thick). Place each slice flat‑side up on the parchment, spacing them about ½ inch apart.
- Second Rise. Cover the tray loosely with a clean kitchen towel and let the bars rise for 20‑30 minutes. They should puff slightly, indicating the yeast is still active.
- Bake. Preheat the oven to 375°F (190°C). Bake the bars for 20‑25 minutes, or until the tops are golden brown and the edges are lightly crisp. A visual cue is the caramelized sheen on the filling.
Similar Recipes
 Desserts
Mini Lemon Cakes
Learn how to make delicious Mini Lemon Cakes. Easy recipe with step-by-step instructions.
 Desserts
Banana Bliss Crumble: A Deliciously Simple Recipe
Delicious Banana Bliss Crumble: A Deliciously Simple Recipe
 Desserts
Best Hawaiian Pineapple Carrot Cream Cake that Delights!
Learn how to make delicious Best Hawaiian Pineapple Carrot Cream Cake that Delights!. Easy recipe with…
 Desserts
Lemon Bars with Shortbread Crust
Learn how to make delicious Lemon Bars with Shortbread Crust. Easy recipe with step-by-step instructions.
 Desserts
Cinnamon Apple Bliss Rolls: A Step-by-Step Guide to Deliciousness
Delicious Cinnamon Apple Bliss Rolls: A Step-by-Step Guide to Deliciousness
 Desserts
Crispy Caramel Apple Delight Pie
Delicious Crispy Caramel Apple Delight Pie
 Desserts
Discover the Joy of Making Salted Caramel Pretzel Bark: A Salty-Sweet Delight
Delicious Discover the Joy of Making Salted Caramel Pretzel Bark: A Salty-Sweet Delight
 Desserts
Chilled Delight: Frozen Caramel Apple Cream Bars
Delicious Chilled Delight: Frozen Caramel Apple Cream Bars

Victoria
I cook these recipes at home before they ever land here — simple ingredients, clear steps.