Crunchy Pickle Chicken Wraps

WANT TO SAVE THIS RECIPE?

Crunchy Pickle Chicken Wraps Recipe

Introduction

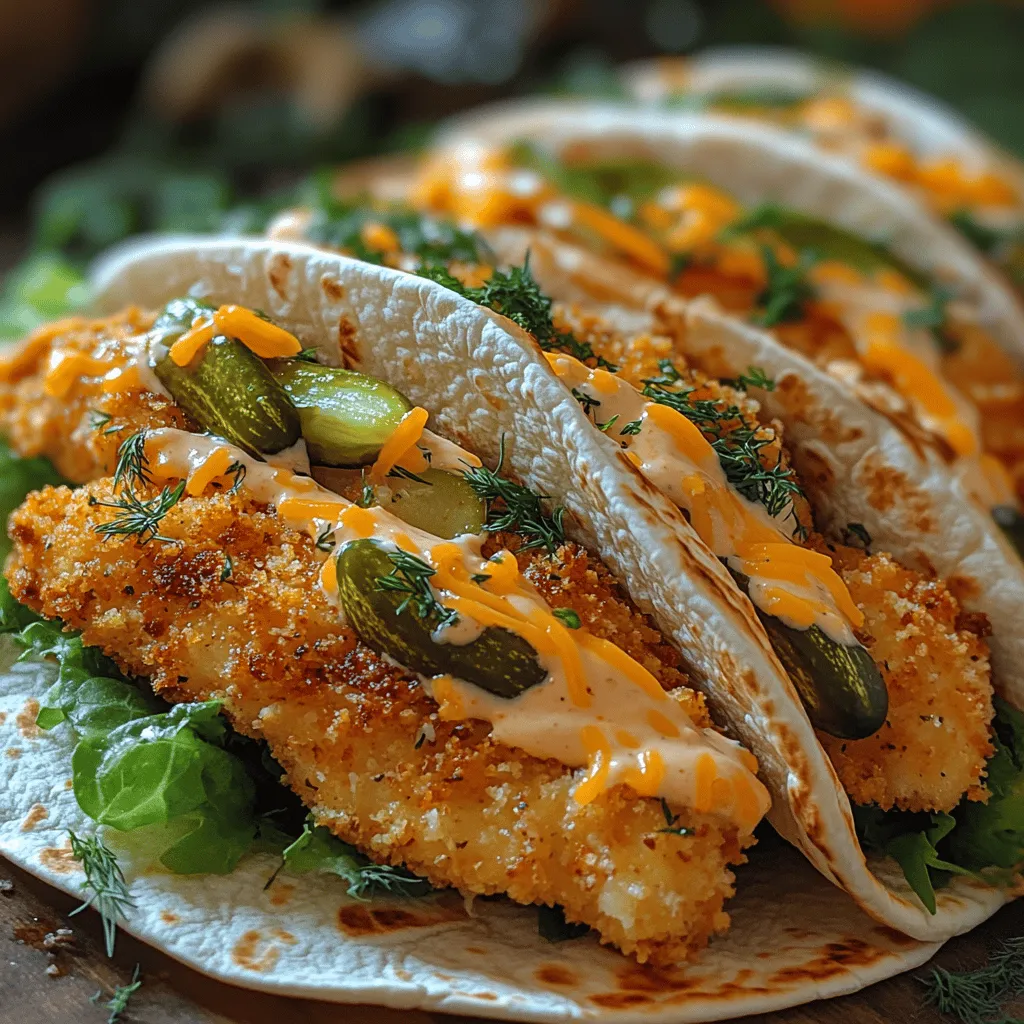
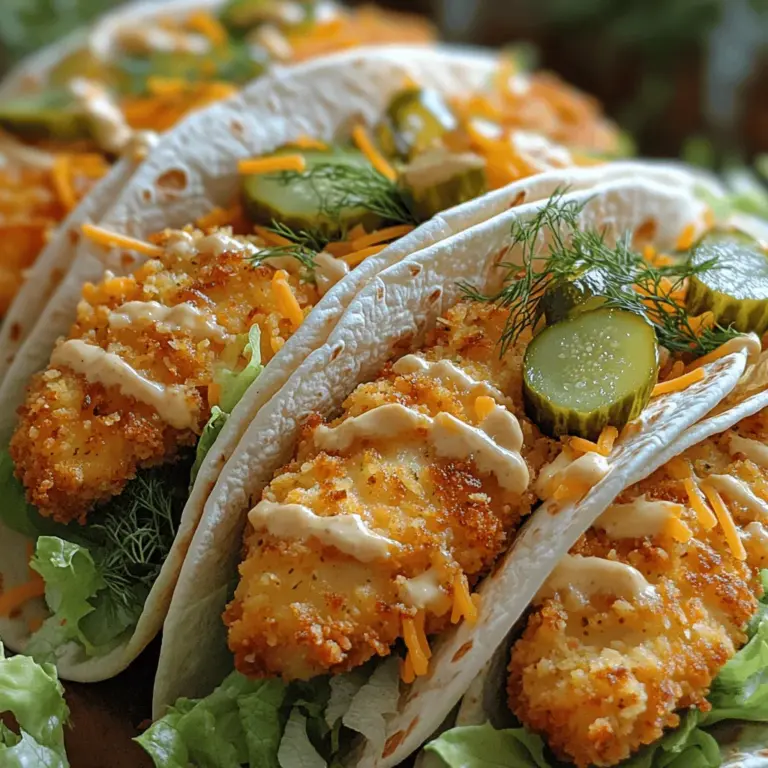
If you’re on the lookout for a meal that combines crunchy textures, tangy flavors, and savory goodness, look no further than Crunchy Pickle Chicken Wraps. This recipe is not only a delightful treat for the taste buds but also a versatile dish perfect for any occasion—whether it’s a quick lunch, a cozy dinner, or a fun addition to a party spread. The unique combination of crispy, breaded chicken paired with the zesty bite of pickles creates a satisfying culinary experience that is sure to please even the pickiest eaters.

The appeal of Crunchy Pickle Chicken Wraps lies in their layered flavors and textures. The juicy chicken, coated in a light and crispy breadcrumb mixture, contrasts beautifully with the crunch of fresh vegetables and the tangy notes of pickles. Wrapped in a soft tortilla, each bite delivers a delightful crunch followed by a savory explosion that will leave you craving more. This recipe not only highlights the joy of cooking but also brings a sense of fun to mealtime, making it a hit among families and friends alike.

Understanding the Key Ingredients

To truly appreciate the magic of Crunchy Pickle Chicken Wraps, it’s essential to understand the key ingredients that come together to create this mouthwatering dish. The main players in this recipe are chicken breasts, pickles, panko breadcrumbs, and a flavorful sauce. Each ingredient plays a crucial role in delivering the final product, ensuring that every bite is as delicious as the last.

Chicken Breasts

The star of this recipe is undoubtedly the chicken breasts. Opting for fresh, high-quality chicken not only enhances the flavor but also ensures a tender and juicy result. Chicken is a fantastic source of lean protein, making it a nutritious choice for any meal. When prepared correctly, it serves as a perfect canvas for the other ingredients, absorbing flavors and adding a satisfying bite.

Pickles

Next up are the pickles, which may seem like an unusual addition to a chicken wrap, but they are essential for enhancing both flavor and texture. The tangy, briny taste of pickles pairs wonderfully with the savory chicken, creating a delightful contrast that elevates the entire dish. Furthermore, pickles are low in calories and provide a good source of antioxidants, making them a guilt-free addition to your meal.

Panko Breadcrumbs

For the crunch factor, panko breadcrumbs are the secret weapon in this recipe. Unlike traditional breadcrumbs, panko is coarser and lighter, resulting in a crunchier texture once fried or baked. This makes them a perfect choice for coating the chicken, ensuring that each piece is enveloped in a satisfying crispiness that complements the juicy meat beneath.

Sauce Ingredients

Finally, the sauce is an integral part of this recipe, bringing all the flavors together in harmony. The sauce typically includes a blend of mayonnaise, mustard, and spices, which adds creaminess and tang to the dish. Each ingredient contributes to the overall flavor profile, making it essential to use fresh, high-quality components.

Step-by-Step Preparation Process

The process of making Crunchy Pickle Chicken Wraps is straightforward and enjoyable, allowing you to bring your culinary skills to life. Below is a detailed guide on how to prepare this delicious dish, starting with the chicken.

Prepping the Chicken

The first step in preparing your Crunchy Pickle Chicken Wraps is to properly prep the chicken breasts. It’s important to ensure that the chicken is of even thickness to promote consistent cooking. To achieve this, place the chicken breasts between two pieces of plastic wrap or parchment paper and pound them gently using a meat mallet or rolling pin. This technique not only helps in tenderizing the meat but also allows for quicker and more even cooking.

Once the chicken breasts are of uniform thickness, trim any excess fat and cut them into manageable strips or chunks, depending on your preference for the wraps. This will make it easier to coat them with the sauce and breadcrumbs later on.

Making the Sauce

Next, we move on to crafting the sauce that will elevate the flavor of your chicken wraps. In a mixing bowl, combine mayonnaise, mustard, a dash of garlic powder, and a sprinkle of paprika for a hint of smokiness. This blend will impart a creamy yet zesty flavor that complements the chicken and pickles perfectly.

To achieve the right consistency, whisk the ingredients together until smooth. If you prefer a thinner sauce, you can add a teaspoon of water or vinegar to loosen it up. Taste the sauce and adjust the seasoning according to your preference—perhaps a bit more mustard for tanginess or a touch of honey for sweetness.

Combining Chicken and Pickles

The next step involves marinating the chicken in the pickle juice. This is where the magic happens, as the pickles not only infuse the chicken with their tangy flavor but also help to tenderize the meat further. Place the chicken strips in a shallow dish and pour enough pickle juice over them to cover. Allow the chicken to marinate for at least 30 minutes in the refrigerator. This process is crucial, as it enhances the overall flavor and ensures that every bite is infused with that delightful pickle taste.

After marinating, remove the chicken from the pickle juice, allowing any excess to drip off. This will prevent the coating from becoming soggy.

Breading the Chicken

Once the chicken is marinated, it’s time to create the crunchy coating. Set up a breading station by placing the panko breadcrumbs in a shallow dish. For added flavor, you can mix in some spices or herbs into the breadcrumbs, such as dried oregano, onion powder, or even a pinch of cayenne for those who enjoy a bit of heat.

Coat each piece of marinated chicken in the panko, pressing gently to ensure an even layer adheres to the meat. This method will help achieve that satisfying crunch when cooked.

For those aiming for maximum crispiness, consider double-dipping the chicken: first in the pickle juice, then in the breadcrumbs, and repeat the process. This additional layer will guarantee a more substantial and satisfying crunch.

Now that you have prepped the chicken, made the sauce, and breaded the chicken, you are well on your way to creating your Crunchy Pickle Chicken Wraps. The next steps will involve cooking the chicken to perfection and assembling the wraps, ensuring that each bite is as delightful as the last. Stay tuned for the continuation of this flavorful journey.

<strong>Introduction</strong>” /></p>
</p>
<h2>Baking the Chicken</h2>
</p>
<p>Baking the chicken is the crucial first step in creating your Crunchy Pickle Chicken Wraps. It ensures that the chicken is cooked evenly, resulting in a tender and flavorful filling. Preheat your oven to 400°F (200°C). This temperature is ideal for achieving a crispy exterior while keeping the inside juicy.</p>
</p>
<h3>Importance of Oven Temperature and Baking Time for Optimal Texture</h3>
</p>
<p>The temperature at which you bake the chicken plays a vital role in the final texture of your wraps. Baking at 400°F allows the chicken to cook quickly, sealing in moisture while creating a delightful crunch. Aim for a baking time of 20-25 minutes, depending on the thickness of your chicken pieces. Thinner cuts will cook faster, while thicker ones may need additional time.</p>
</p>
<h3>Signs to Look for to Ensure Chicken is Cooked Through</h3>
</p>
<p>To ensure your chicken is thoroughly cooked, use a meat thermometer to check the internal temperature. It should reach at least 165°F (75°C). If you don’t have a thermometer, look for juices that run clear when pierced with a fork. The chicken should also be opaque throughout with no pink remaining. Allow the chicken to rest for a few minutes after baking; this helps retain its juices and enhances flavor.</p>
</p>
<h2>Assembling the Wraps</h2>
</p>
<p>Now that your chicken is perfectly baked, it’s time to assemble your wraps. The way you layer the ingredients will significantly impact the flavor and texture of your final dish.</p>
</p>
<h3>Layering Ingredients for the Best Flavor and Texture</h3>
</p>
<p>Start with a warm tortilla as your base. This not only adds flavor but also helps in rolling the wrap more easily. Begin by placing a generous layer of fresh greens, such as spinach or romaine, on the tortilla. This will provide a crispiness that complements the crunchy pickles. Next, add a layer of the baked chicken, followed by a handful of crunchy pickles. The pickles add a zesty kick that balances the richness of the chicken.</p>
</p>
<p>For an extra layer of flavor, consider adding shredded cheese or a dollop of your favorite sauce before wrapping it all together. The sauce is not just an additional flavor; it helps to bind everything together, ensuring that each bite is bursting with flavor.</p>
</p>
<h3>Suggestions for Alternative Toppings or Variations</h3>
</p>
<p>Feel free to get creative with your toppings. Consider adding sliced tomatoes, diced red onions, or even sliced jalapeños for a spicy kick. You could also substitute the pickles for other crunchy vegetables like shredded carrots or cucumbers. Avocado slices can add a creamy texture, while different types of cheese can enhance the flavor profile.</p>
</p>
<h3>Importance of the Sauce in Tying Together the Flavors</h3>
</p>
<p>Choosing the right sauce can elevate your Crunchy Pickle Chicken Wraps to new heights. A tangy ranch dressing or a creamy garlic sauce pairs exceptionally well with the crunch of the pickles and the savory chicken. For a healthier option, a light vinaigrette or yogurt-based sauce can also work wonders. Make sure to drizzle enough sauce to coat the ingredients without making the wrap soggy.</p>
</p>
<h2>Rolling Techniques</h2>
</p>
<p>Rolling your wraps properly ensures that all the delicious fillings stay intact, making for a neat presentation and easier eating.</p>
</p>
<h3>Step-by-Step Guide on Rolling the Wraps Properly</h3>
</p>
<p>1. <strong>Prepare the Tortilla</strong>: Place your tortilla on a clean, flat surface. If it’s too stiff, warm it slightly in the microwave for about 10 seconds to make it pliable.</p>
</p>
<p>2. <strong>Add Ingredients</strong>: Layer your greens, chicken, pickles, toppings, and sauce in the center of the tortilla, leaving about 2 inches on each side.</p>
</p>
<p>3. <strong>Fold the Sides</strong>: Start by folding the left and right sides of the tortilla inward over the filling.</p>
</p>
<p>4. <strong>Roll from the Bottom</strong>: Begin rolling the tortilla from the bottom up, tucking the ingredients in as you go. Roll tightly but not so much that the filling spills out.</p>
</p>
<p>5. <strong>Seal the Wrap</strong>: Once rolled, you can use a toothpick to secure the wrap if necessary. Alternatively, you can place the seam side down on a plate to keep it closed.</p>
</p>
<h3>Tips for Keeping the Wraps Together During Serving</h3>
</p>
<p>To ensure your wraps hold together during serving, consider wrapping them in parchment paper or foil. This not only keeps everything intact but also adds a rustic touch to your presentation. If serving immediately, you can slice the wraps in half diagonally for a more appealing look.</p>
</p>
<h2>Serving Suggestions and Pairings</h2>
</p>
<p>Crunchy Pickle Chicken Wraps are versatile and can be served in various ways to enhance your meal experience.</p>
</p>
<h3>Ideas for Side Dishes that Complement the Wraps</h3>
</p>
<p>Pair your wraps with a light side salad, coleslaw, or sweet potato fries for a complete meal. A simple cucumber salad drizzled with vinegar can also provide a refreshing contrast to the savory wraps. For a more substantial side, consider serving potato wedges seasoned with herbs.</p>
</p>
<h3>Recommendations for Beverages that Pair Well with the Meal</h3>
</p>
<p>When it comes to beverages, a chilled lemonade or iced tea perfectly complements the flavors of the wraps. For adult gatherings, a light beer or a crisp white wine can also work well. If you’re looking for something non-alcoholic, sparkling water with a slice of lemon is a refreshing choice.</p>
</p>
<h3>Perfect Occasions for Serving Crunchy Pickle Chicken Wraps</h3>
</p>
<p>These wraps are ideal for a casual family dinner, a picnic, or even a potluck. They are easy to prepare in large quantities and can be made ahead of time, making them a convenient option for gatherings. Their appealing presentation and delicious flavors make them a crowd-pleaser for any occasion.</p>
</p>
<h2>Exploring Variations of Crunchy Pickle Chicken Wraps</h2>
</p>
<p>One of the best aspects of Crunchy Pickle Chicken Wraps is their adaptability. Here are some ways to customize the recipe to suit your preferences.</p>
</p>
<h3>Suggestions for Customizing the Recipe</h3>
</p>
<p>You can easily tweak this recipe by adding spices to the chicken before baking. Try incorporating garlic powder, paprika, or even a hint of cumin for added depth of flavor. If you’re looking for a different protein, consider using shredded rotisserie chicken or grilled shrimp for a seafood twist.</p>
</p>
<h3>Vegetarian or Vegan Alternatives for the Wrap</h3>
</p>
<p>For a vegetarian option, you can replace the chicken with grilled vegetables, chickpeas, or tofu marinated in your favorite flavors. For a vegan alternative, use plant-based proteins and ensure your sauce is dairy-free. This way, everyone can enjoy the Crunchy Pickle Wrap experience.</p>
</p>
<h3>Seasonal Variations to Adapt the Recipe Throughout the Year</h3>
</p>
<p>As the seasons change, so can your wrap ingredients. In the summer, use fresh herbs like basil or cilantro and substitute the pickles with fresh tomatoes or zucchini. In the fall, consider adding roasted butternut squash and spinach for a heartier wrap that reflects the season.</p>
</p>
<h2>Conclusion</h2>
</p>
<p>In summary, Crunchy Pickle Chicken Wraps offer a delightful, easy-to-make meal that combines flavor and texture in every bite. With their simple preparation and versatility, they’re perfect for busy weeknights, gatherings, or as a fun lunch option. We encourage you to try this recipe and enjoy the satisfying crunch and bold flavors it brings to your table.</p>
</p>
<p>Ultimately, cooking is about joy, creativity, and sharing meals with loved ones. So gather your ingredients, roll up your sleeves, and dive into the fun of making these wraps. You’ll find that not only do they taste incredible, but they also create lasting memories around the dinner table.</p>
</div>

Introduction

Crunchy Pickle Chicken Wraps

Discover a delicious way to spice up mealtime with Crunchy Pickle Chicken Wraps! This easy recipe combines crispy breaded chicken, tangy pickles, and fresh veggies all wrapped in a soft tortilla. Perfect for lunch, dinner, or parties, these wraps bring a satisfying crunch and a burst of savory flavor to your table. With simple ingredients and customizable toppings, you'll love making these wraps your family's new favorite dish. Enjoy the fun of cooking and the joy of sharing!

Ingredients
  

1 lb (450g) boneless, skinless chicken breasts

1 cup dill pickles, chopped (plus extra for garnish)

½ cup mayonnaise

2 tbsp Dijon mustard

1 tsp garlic powder

½ tsp onion powder

½ tsp salt

¼ tsp black pepper

1 cup panko breadcrumbs

2 tbsp olive oil

4 large flour tortillas

2 cups shredded lettuce

1 cup shredded cheddar cheese

Fresh dill, for garnish (optional)

Instructions
 

Prep the Chicken: Start by preheating your oven to 400°F (200°C). Place the chicken breasts on a cutting board and pound them to an even thickness. This helps ensure even cooking. Cut the chicken into strips.

    Make the Sauce: In a medium bowl, combine the mayonnaise, Dijon mustard, garlic powder, onion powder, salt, and pepper. Mix well until smooth.

      Combine Chicken and Pickles: In a large bowl, mix the chicken strips with the chopped dill pickles and half of the sauce (reserve the remaining sauce for serving). Toss until the chicken is well-coated.

        Bread the Chicken: Place the panko breadcrumbs in a shallow dish. Take each coated chicken strip and roll it in the panko until fully covered. This will create a delightful crunch when baked.

          Bake the Chicken: Line a baking sheet with parchment paper and place the breaded chicken strips on it. Drizzle with olive oil, which will help them crisp up in the oven. Bake for 20-25 minutes, or until the chicken is golden brown and cooked through (internal temperature should reach 165°F or 75°C).

            Assemble the Wraps: On each flour tortilla, spread a generous amount of the reserved sauce. Layer the shredded lettuce, baked crunchy pickle chicken, and shredded cheddar cheese. If you like, add more pickles for extra crunch.

              Roll and Serve: Tightly roll each tortilla away from you to create a wrap, tucking in the ends as you go. Slice in half to serve. Garnish with fresh dill if desired, and serve with any remaining sauce for dipping.

                Prep Time, Total Time, Servings: 15 minutes | 40 minutes | 4 servings

                  WANT TO SAVE THIS RECIPE?

                  Leave a Comment

                  Recipe Rating