Decadent Oreo Lasagna to Wow Your Taste Buds at Home
 Save
Save
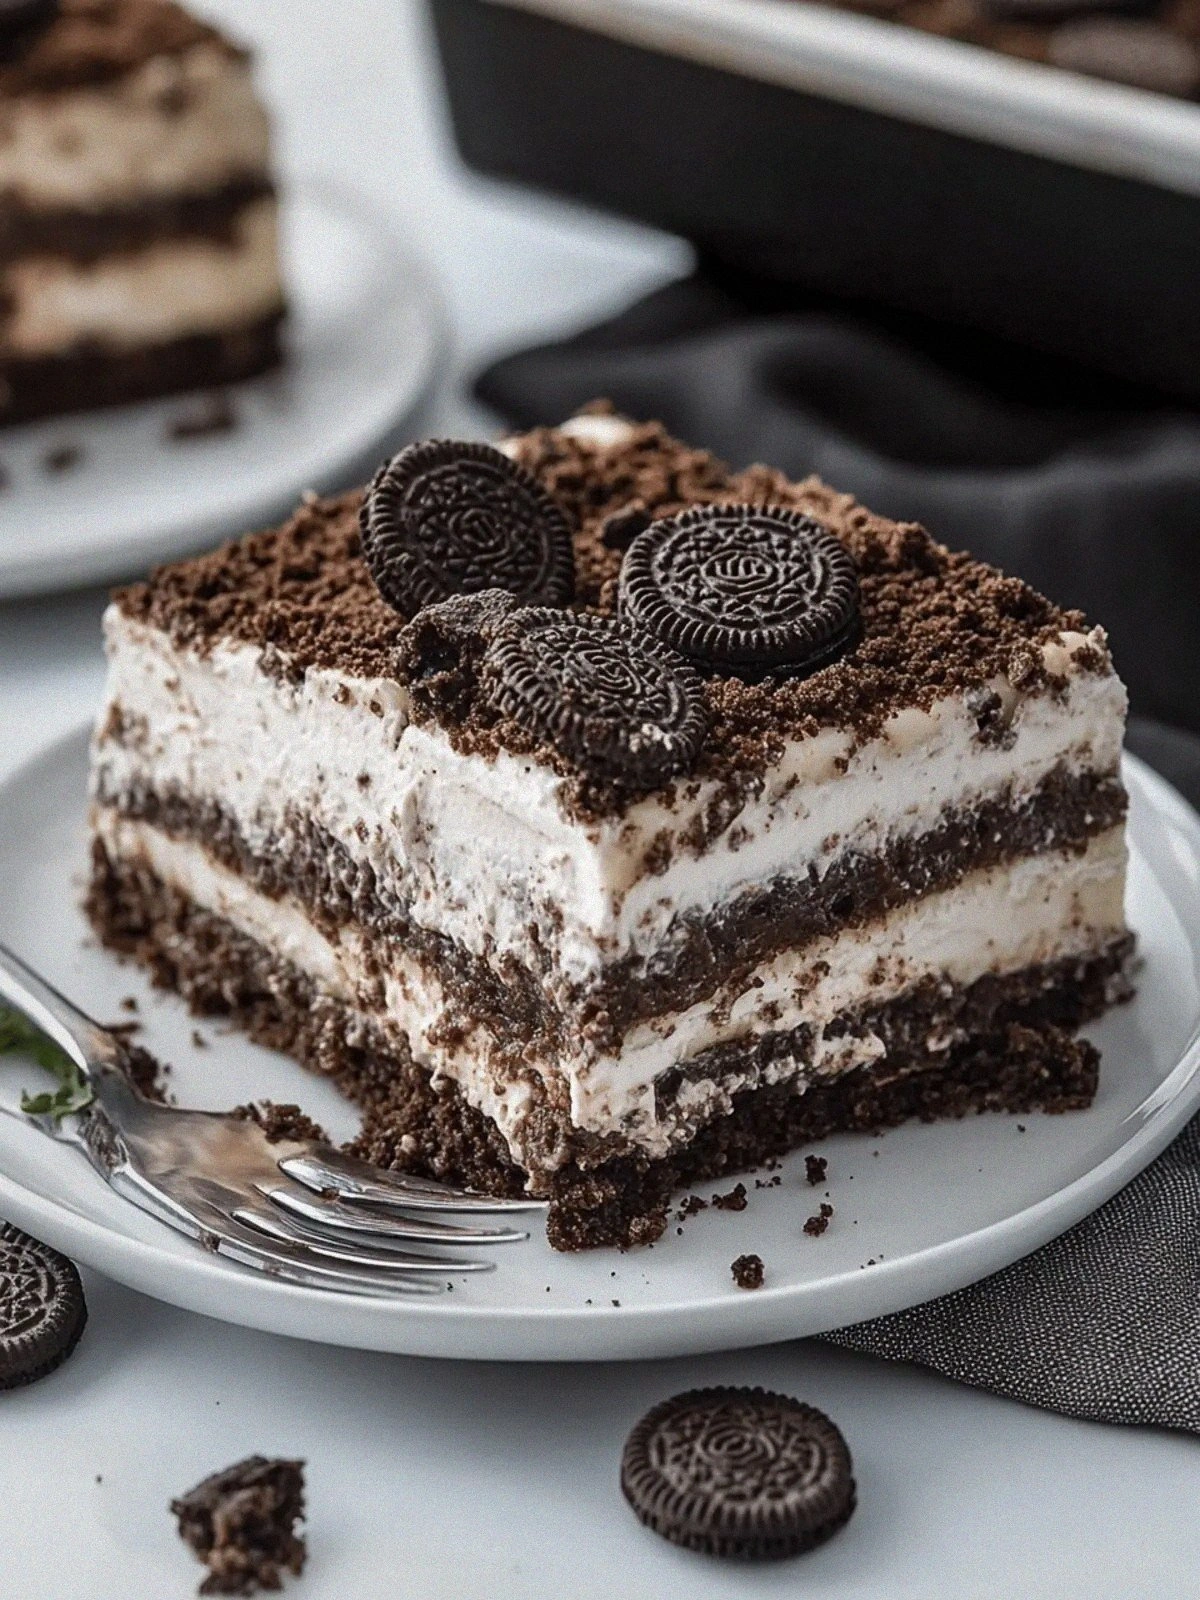
The first time I tried to make a dessert that felt like a celebration in a single bite, I was standing in my tiny kitchen on a rainy Saturday afternoon, the kind of day when the clouds seem to hug the house and the scent of fresh coffee drifts from the pot. I pulled out a box of Oreo cookies, the kind that crackle softly when you twist them apart, and suddenly the whole room felt like a bakery in a movie. The moment I layered that buttery crumble with a silky, sweet cream, the air filled with a perfume of chocolate and vanilla that made my heart race – it was as if the kitchen itself was humming a happy tune. That feeling, that instant connection between flavor and memory, is exactly why I fell in love with what I now call Decadent Oreo Lasagna, and why I can’t wait to share it with you.
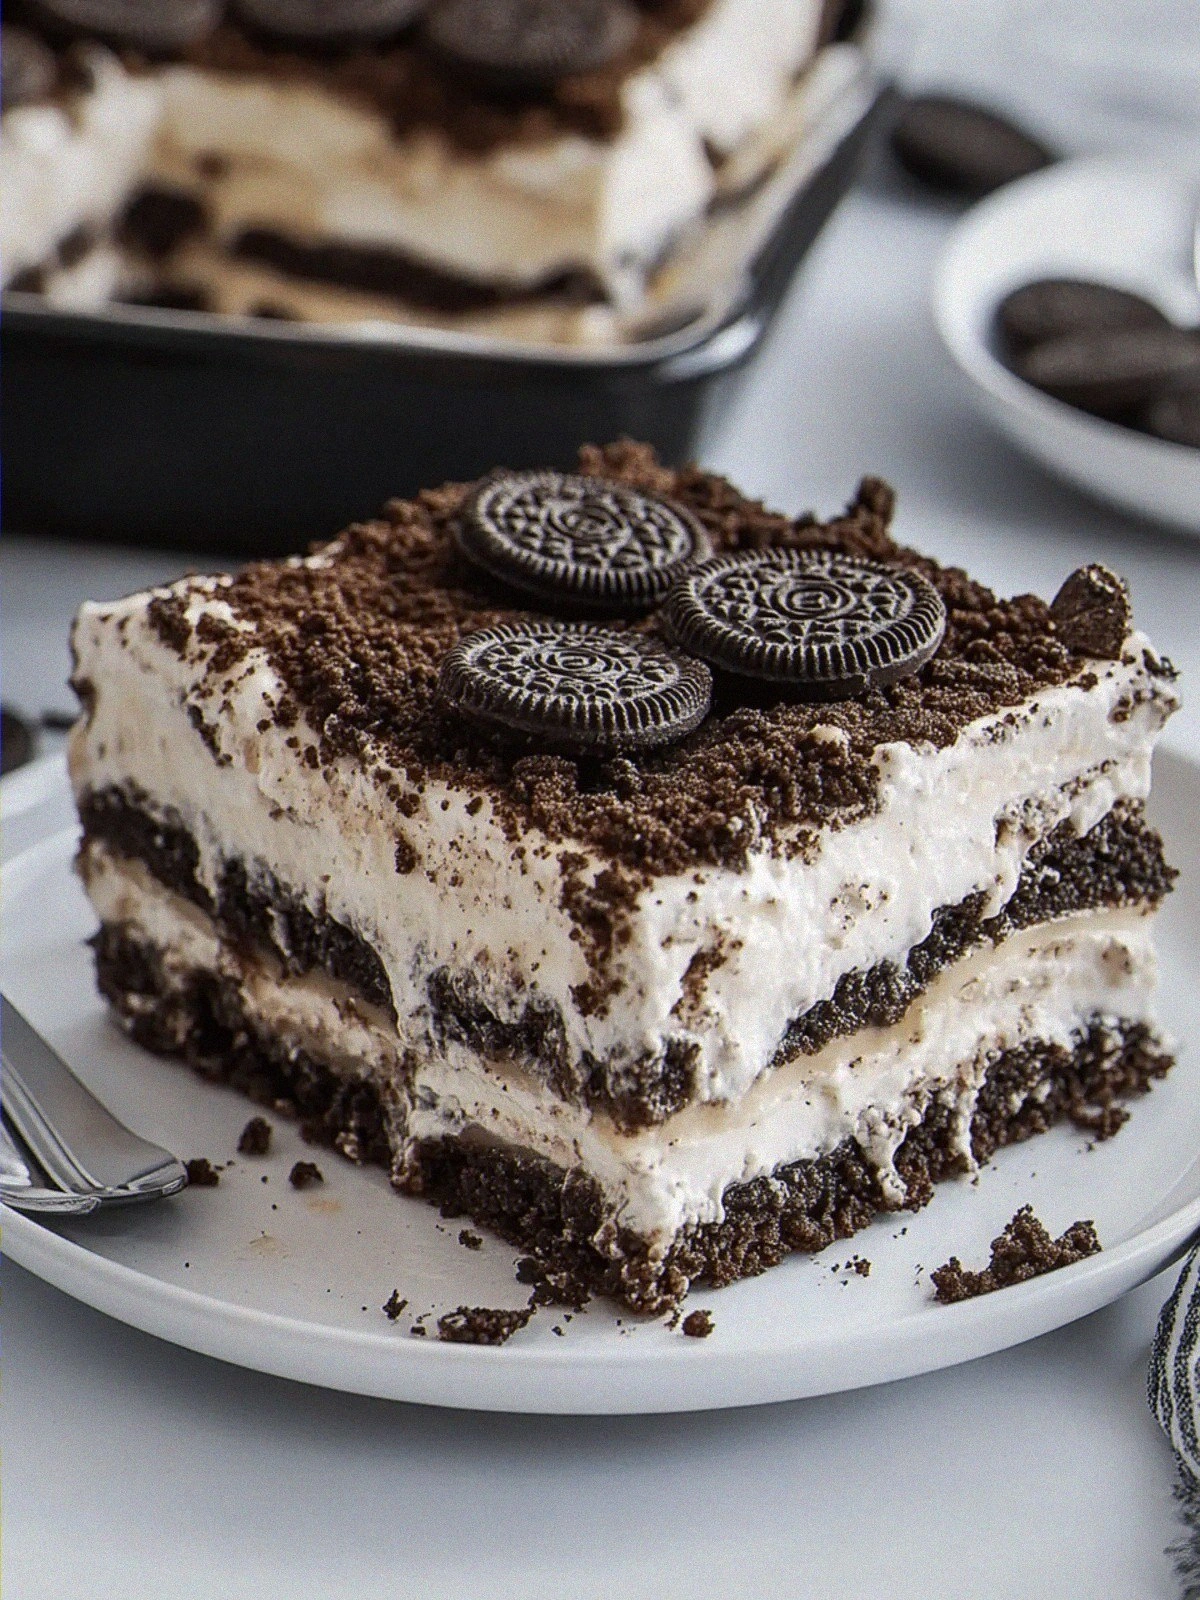
Imagine the scene: you lift the lid of the baking dish and a cloud of fragrant steam rushes toward you, carrying whispers of cocoa, butter, and a hint of vanilla that makes your mouth water before you even take the first forkful. The top layer is a glossy, chocolate‑kissed surface that crackles ever so slightly, while the interior is a dreamy cascade of creamy layers that melt like clouds on a summer day. Every bite is a textural symphony – the crunchy cookie base, the airy whipped topping, and the smooth, velvety pudding that binds everything together. The best part? It looks as impressive as it tastes, so you can serve it at a dinner party and watch your guests’ eyes widen in anticipation.
But wait – there’s a secret technique hidden in step four that turns this dessert from “wow” to “mind‑blown.” I discovered it by accident when a friend suggested I chill the lasagna overnight; the result was a firmer, more cohesive slice that held its shape like a perfectly layered cake. You’ll see exactly how to execute that trick later, and I promise you’ll never settle for a soggy bottom again. Have you ever wondered why the restaurant version of an Oreo dessert always seems richer and more balanced? The answer lies in a few simple adjustments that I’ll walk you through, step by step.
Now, if you’re ready to create a dessert that will have your family begging for seconds and your friends asking for the recipe, keep reading. I’m about to break down every component, from the buttery crust to the luscious filling, and I’ll sprinkle in a handful of pro tips that even seasoned bakers love. Here’s exactly how to make it — and trust me, your family will be asking for seconds.
🌟 Why This Recipe Works
- Flavor Depth: The combination of crushed Oreo cookies with melted butter creates a base that’s both crunchy and buttery, providing a sturdy platform for the creamy layers to shine. The subtle bitterness of the cocoa balances the sweetness of the whipped topping, resulting in a harmonious flavor profile that satisfies both kids and adults.
- Texture Contrast: Each layer offers a distinct mouthfeel – the crisp cookie crust, the smooth pudding, and the airy Cool Whip topping. This contrast keeps the palate engaged from the first bite to the last, preventing the dessert from feeling one‑dimensional.
- Ease of Assembly: No fancy equipment is required; a food processor or zip‑top bag does the crushing, a mixing bowl for the filling, and a simple baking dish for layering. Even if you’ve never baked before, the step‑by‑step instructions make it feel like a breeze.
- Time Efficiency: While the total hands‑on time is under 30 minutes, the chilling period does the heavy lifting, allowing you to prep ahead of a gathering and focus on other dishes.
- Versatility: The recipe can be customized with different mix‑ins, such as chopped nuts, caramel drizzle, or even a layer of fresh berries, making it adaptable for various occasions and dietary tweaks.
- Ingredient Quality: Using full‑fat cream cheese and real vanilla extract elevates the richness, while the instant chocolate pudding guarantees a smooth, glossy finish without the need for a stovetop.
- Crowd‑Pleasing Factor: Oreo cookies are a universally loved snack, and turning them into a lasagna‑style dessert taps into nostalgia while delivering a fresh, upscale presentation that impresses guests.
🥗 Ingredients Breakdown
The Foundation – Crunchy Cookie Crust
The base of this lasagna starts with 48 Oreo cookies, which you’ll crush into fine crumbs. The cookies provide a deep chocolate flavor and a subtle hint of cream that pairs beautifully with the butter. When you blend the crumbs with 10 tablespoons of salted butter, you create a cohesive, buttery “dough” that holds together when pressed into the pan. If you’re looking for a gluten‑free version, try using gluten‑free chocolate sandwich cookies – the texture will stay the same, and the flavor will still sing.
The Creamy Core – Cheese & Pudding Fusion
At the heart of the dish is a luscious mixture of 12 ounces of cream cheese, ¾ cup of powdered sugar, 1 teaspoon of vanilla extract, and 7.8 ounces of instant chocolate pudding. The cream cheese adds a tangy richness that cuts through the sweetness, while the powdered sugar ensures a smooth, melt‑in‑your‑mouth consistency. The vanilla extract is a tiny but mighty ingredient; it brightens the chocolate flavor and adds a fragrant undertone that you’ll notice with each bite. If you’re avoiding dairy, a plant‑based cream cheese works just as well, though the texture may be slightly lighter.
The Light Lift – Whipped Topping
Two separate portions of Cool Whip (8 ounces each) are folded into the mixture at different stages. The first half is blended directly with the cream cheese and pudding to give the filling body, while the second half is spread on top for a fluffy crown that softens the overall richness. This dual‑layer approach creates a light, airy finish that contrasts delightfully with the dense cookie crust. For a healthier twist, you can substitute with a homemade whipped topping made from chilled heavy cream and a dash of honey.
The Silky Sauce – Milk & Pudding Blend
To achieve that glossy, melt‑in‑the‑mouth sauce, you’ll whisk together 3 cups of half‑and‑half (or whole milk) with the instant chocolate pudding until it thickens. This mixture becomes the “sauce” that seeps into the layers, ensuring each bite is moist without being soggy. If you prefer a richer sauce, swap half‑and‑half for a blend of heavy cream and milk in equal parts; the result is a luxuriously thick glaze.
With your ingredients prepped and ready, let's get cooking. Here's where the fun really begins...
🍳 Step-by-Step Instructions
🔐 Expert Tips for Perfect Results
The Taste Test Trick
Before you commit the lasagna to the oven, take a small spoonful of the filling and taste it. This quick check lets you adjust the sweetness or add a pinch more vanilla if the flavor feels flat. I once missed this step and ended up with a filling that was a tad too bitter – a simple taste test would have saved me a whole re‑bake.
Why Resting Time Matters More Than You Think
Allowing the lasagna to chill not only solidifies the layers but also gives the butter in the crust time to re‑absorb moisture, preventing a soggy bottom. The longer it rests, the cleaner the slices will be. I’ve found that a minimum of two hours works, but an overnight rest turns the dessert into a true “set‑and‑forget” masterpiece.
The Seasoning Secret Pros Won’t Tell You
A pinch of sea salt sprinkled over the top just before baking amplifies the chocolate flavor and balances the sweetness. This tiny addition is a game‑changer that professional pastry chefs use to elevate desserts without adding extra calories. Trust me on this one – you’ll notice the difference instantly.
The Cool Whip Consistency Hack
If your Cool Whip seems too soft, place the tub in the freezer for 10‑15 minutes before folding it into the mixture. This firms it up, making it easier to incorporate without turning the filling watery. I once left the tub out on a warm kitchen counter and ended up with a runny top layer – a quick freeze saves the day.
Layering for Visual Impact
When spreading the filling, use a offset spatula to create gentle peaks rather than a flat surface. Those peaks will rise slightly during baking, giving the final dish a beautiful, undulating top that looks as impressive as it tastes. The visual appeal is half the fun, especially when you’re serving guests who love Instagram‑worthy desserts.
🌈 Delicious Variations to Try
One of my favorite things about this recipe is how versatile it is. Here are some twists I've tried and loved:
Mint‑Chocolate Dream
Add a teaspoon of peppermint extract to the cream cheese mixture and fold in a handful of crushed mint chocolate chips. The refreshing mint cuts through the richness, making it perfect for holiday gatherings. The result is a cool, invigorating bite that still feels indulgent.
Salted Caramel Swirl
Drizzle a generous amount of homemade or store‑bought salted caramel sauce over the Cool Whip topping before chilling. The caramel adds a buttery, slightly salty ribbon that pairs beautifully with the chocolate base, creating a sweet‑and‑salty masterpiece.
Nutty Crunch
Fold in ½ cup of toasted chopped hazelnuts or pecans into the filling for an added crunch. The nuts bring a warm, earthy flavor that complements the chocolate, and they also add a pleasant surprise when you bite through the creamy layers.
Berry‑Burst Delight
Layer fresh raspberries or sliced strawberries between the pudding filling and the Cool Whip topping. The tartness of the berries balances the sweetness, and the burst of color makes the dish look festive. Just be sure to add the berries after the lasagna has cooled to prevent them from turning mushy.
Espresso Infusion
Replace ¼ cup of the half‑and‑half with strong brewed espresso and add a pinch of instant coffee granules to the pudding mix. This gives the dessert a deep, coffee‑laden flavor that pairs wonderfully with the chocolate, turning it into a dessert‑after‑dinner treat for caffeine lovers.
📦 Storage & Reheating Tips
Refrigerator Storage
Store any leftovers in an airtight container in the refrigerator for up to 4 days. The chilled environment keeps the layers firm and prevents the crust from becoming soggy. When you’re ready to serve, let the lasagna sit at room temperature for 10‑15 minutes to bring back a bit of softness to the whipped topping.
Freezing Instructions
For longer storage, wrap the entire dish tightly in plastic wrap followed by a layer of aluminum foil, then freeze for up to 2 months. To thaw, move the lasagna to the refrigerator overnight, then let it sit at room temperature for a short while before serving. The texture remains excellent, and the crust stays crisp if you re‑bake it briefly.
Reheating Methods
If you prefer a warm dessert, reheat individual slices in a preheated 300°F (150°C) oven for 8‑10 minutes, or microwave for 20‑30 seconds. The trick to reheating without drying it out? Add a splash of milk or a drizzle of chocolate sauce before warming, then cover loosely with foil to trap moisture.
❓ Frequently Asked Questions
Can I use a different type of cookie for the crust?
Do I have to bake the lasagna, or can I make it no‑bake?
What if I don’t have Cool Whip?
Can I make this recipe vegan?
How do I prevent the crust from becoming soggy?
Can I add fresh fruit to the lasagna?
Is it okay to use low‑fat cream cheese?
What’s the best way to slice the lasagna?
Similar Recipes
 Desserts
Laura Bush’s Cowboy Cookies Recipe – 12 Sensational Tips for Perfect Cookies
Learn how to make delicious Laura Bush’s Cowboy Cookies Recipe – 12 Sensational Tips for Perfect…
 Desserts
Banana Bliss Cake: A Deliciously Moist Treat
Delicious Banana Bliss Cake: A Deliciously Moist Treat
 Desserts
Pumpkin Pie Dip
Discover the perfect pumpkin pie dip—smooth cream cheese, warm spices, and a hint of maple. Serve…
 Desserts
Cinnamon Roll Bliss Bars Recipe Easy Dessert Bars to Bake
Learn how to make delicious Cinnamon Roll Bliss Bars Recipe Easy Dessert Bars to Bake. Easy…
 Desserts
Lemon and Caramel Cream Cake
Learn how to make delicious Lemon and Caramel Cream Cake. Easy recipe with step-by-step instructions.
 Desserts
Delight in Homemade Raspberry Cinnamon Rolls with Lemon Glaze
Learn how to make delicious Delight in Homemade Raspberry Cinnamon Rolls with Lemon Glaze. Easy recipe…
 Desserts
Sunny Citrus Delight Cookies: A Bright Baking Experience
Delicious Sunny Citrus Delight Cookies: A Bright Baking Experience
 Desserts
Berry Bliss Frozen Strawberry Yogurt Pops: Recipe Completion and Serving Suggestions
Delicious Berry Bliss Frozen Strawberry Yogurt Pops: Recipe Completion and Serving Suggestions

Victoria
I cook these recipes at home before they ever land here — simple ingredients, clear steps.
Other Reader Favorites
 Dinner
Easy Weeknight Creamy Tuscan Shrimp with Spinach and Tomatoes
Learn how to make delicious Easy Weeknight Creamy Tuscan Shrimp with Spinach and Tomatoes. Easy recipe…
 Dinner
30-Minute Bob Evans Cheddar Potato Soup – Ultimate Comfort
Learn how to make delicious 30-Minute Bob Evans Cheddar Potato Soup – Ultimate Comfort. Easy recipe…
 Breakfast
Cinnamon Apple Pie Baked French Toast Recipe
Delicious Cinnamon Apple Pie Baked French Toast Recipe
 Dinner
Quick & Healthy Mediterranean Chicken Gyros Recipe
Learn how to make delicious Quick & Healthy Mediterranean Chicken Gyros Recipe. Easy recipe with step-by-step…