Introduction: The Allure of Fall Flavors in a Golden Butternut Squash and Goat Cheese Galette
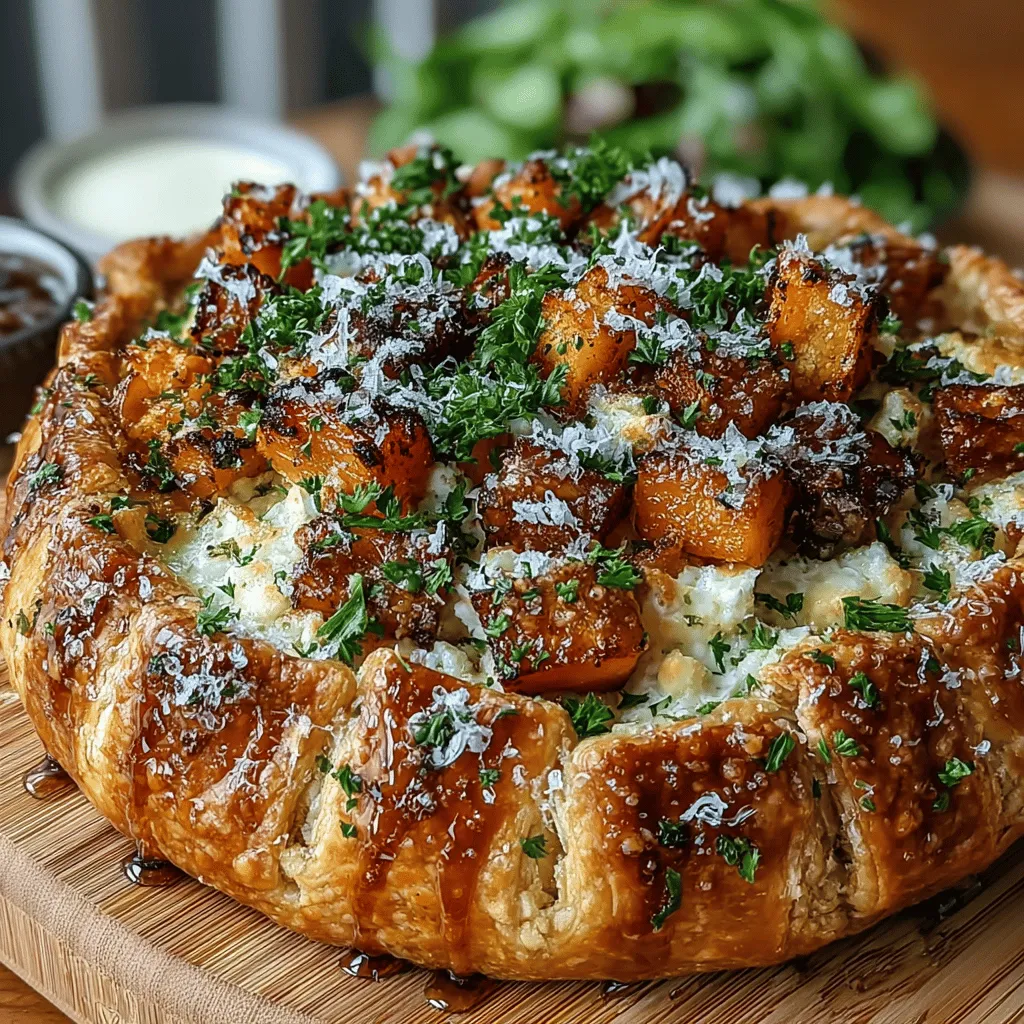
As the leaves turn golden and the air becomes crisp, the culinary world welcomes the bounty of fall harvests. Among the seasonal delights, the golden butternut squash and goat cheese galette stands out as an emblem of autumn’s warmth and richness. This rustic, free-form tart not only showcases the sweet, nutty flavor of roasted butternut squash but also combines the tangy creaminess of goat cheese, enriched with the aromatic essence of thyme and caramelized onions. Each bite offers a perfect harmony of textures and tastes, making it an ideal dish for cozy family gatherings or elegant dinner parties.
This galette is more than just a dish; it’s a celebration of seasonal ingredients and a comforting reminder of home-cooked meals. The flaky crust envelops a savory filling that encapsulates the essence of fall, making it a versatile option for any meal, whether served as a hearty main course or a delightful side. In this article, we will delve into the various elements of this delectable recipe, exploring its nutritional benefits and providing tips for perfecting your galette, ensuring that your culinary creation is as beautiful as it is delicious.
Understanding the Key Ingredients
Exploring Butternut Squash: A Nutritional Powerhouse
Butternut squash is a staple of autumn cuisine, known for its sweet flavor and smooth texture. This vibrant orange vegetable is not only a feast for the eyes but also a nutritional powerhouse. Rich in vitamins A and C, butternut squash supports immune health and promotes healthy skin. It also contains significant amounts of fiber, which aids in digestion and contributes to a feeling of fullness, making it a fantastic addition to any meal.
When selecting butternut squash, look for specimens that are firm and heavy for their size, with a uniform beige color and minimal blemishes. Avoid squash with soft spots or signs of decay, as these may indicate overripeness. A perfectly ripe butternut squash will yield a rich flavor when roasted, enhancing the overall taste of your galette.
The Role of Goat Cheese in Culinary Creations
Complementing the sweetness of butternut squash is goat cheese, an ingredient that adds a depth of flavor and creamy richness. Known for its tangy profile and smooth texture, goat cheese transforms any dish into a gourmet experience. Nutritionally, it offers a good source of protein and calcium while being lower in fat than many cow’s milk cheeses, making it a healthier choice for those looking to indulge without overdoing it.
There are various types of goat cheese available, ranging from fresh and spreadable varieties to aged, crumbly options. For this galette, a soft, creamy goat cheese works best, as it melts beautifully into the roasted squash and creates a luscious filling. The combination of flavors between the sweet butternut squash and the tangy goat cheese creates a delightful contrast that is both comforting and sophisticated.
The Importance of Fresh Herbs
To elevate the flavors of the galette, fresh herbs play a crucial role, with thyme being the star of the show. Thyme’s earthy, slightly minty flavor complements the sweetness of butternut squash beautifully, enhancing the overall dish without overpowering it. Fresh herbs not only contribute to the taste but also add a pop of color, making the galette visually appealing.
When using herbs in cooking, the choice between fresh and dried often depends on the desired intensity of flavor. Fresh herbs, like thyme, are typically more aromatic and vibrant, making them ideal for dishes that require a fresh touch. For this recipe, incorporating fresh thyme will provide a brighter flavor profile. However, if fresh thyme is unavailable, dried thyme can be used as a substitute, although it’s essential to adjust the quantity, as dried herbs are generally more concentrated.
Preparation Steps for a Perfect Galette
Prepping the Butternut Squash: Techniques for Roasting
The preparation of the butternut squash is a crucial step in creating a delicious galette. Start by peeling the squash using a sharp vegetable peeler, ensuring that you remove the tough outer skin. Once peeled, cut the squash in half lengthwise and scoop out the seeds with a spoon. Next, slice the squash into small, even cubes, which will roast more evenly and absorb flavors better.
To enhance the natural sweetness of the butternut squash, season the cubes with salt, pepper, and a sprinkle of fresh thyme. This simple seasoning will elevate the flavor profile and create a more complex taste in the final dish. When it comes to roasting, preheat your oven to a high temperature, around 400°F (200°C), which caramelizes the squash beautifully, bringing out its inherent sweetness. Spread the seasoned cubes in a single layer on a baking sheet and roast for approximately 25-30 minutes, or until they are tender and golden brown. This roasting technique not only intensifies the flavor but also contributes to the galette’s overall texture.
Making the Dough: Choosing Between Store-Bought and Homemade
The crust of a galette is its foundation, and while some might opt for the convenience of store-bought pie crust, making your own galette dough can be a rewarding experience. Homemade dough allows for greater control over the ingredients and can yield a more flavorful, flaky texture. If you’re interested in making your own dough, a simple recipe typically includes flour, cold butter, salt, and ice water. The key to a perfect crust is to handle the dough as little as possible, keeping the butter cold to achieve that desired flakiness.
If time is of the essence, a high-quality store-bought pie crust can be an excellent alternative. Look for options that are made with simple, natural ingredients, avoiding those with artificial additives. Regardless of which crust you choose, ensure that it is chilled before assembly to prevent shrinkage during baking.
Sautéing Onions: Building Layers of Flavor
Onions are often considered the backbone of many savory dishes, and their role in the butternut squash galette is no exception. Sautéing onions until they become caramelized enhances their natural sweetness and adds a rich depth of flavor that complements the other ingredients beautifully. Start by slicing the onions thinly and adding them to a skillet with a drizzle of olive oil over medium heat. Stir occasionally until the onions soften and turn golden brown, which can take about 15-20 minutes.
This process not only develops the onions’ sweetness but also allows them to meld with the other flavors in the galette. The savory notes of the caramelized onions, combined with the creamy goat cheese and roasted butternut squash, create a filling that is bursting with flavor and perfect for enveloping in a flaky crust.
In summary, the golden butternut squash and goat cheese galette is a culinary representation of fall, rich in flavor and texture. As we continue to explore this delightful recipe, we will share additional tips and techniques to ensure your galette is nothing short of spectacular.
Techniques for Sautéing: Achieving the Right Texture and Aroma
Sautéing is a fundamental technique in cooking that enhances the flavors and textures of your ingredients, especially when preparing the filling for your golden butternut squash and goat cheese galette. To achieve the perfect sauté, start by heating your skillet over medium heat. The right temperature is crucial; too low, and your vegetables may become soggy, while too high may burn them.
Once the skillet is hot, add a splash of olive oil or a combination of butter and oil for added richness. As the fat heats up, incorporate your onions and butternut squash. The key here is to sauté them until they are tender and caramelized, which usually takes about 10-15 minutes. Stir occasionally to prevent sticking and ensure even cooking. The onions should become translucent and slightly golden, while the squash should be soft but still retain some structure.
The Importance of Timing: When to Sauté During Galette Preparation
Timing is essential in the galette preparation process. Sauté your filling components right after you prepare your dough and allow it to chill in the refrigerator. This way, the filling will be ready just as you finish rolling out your dough, ensuring that everything is fresh and at the right temperature for assembly.
This method not only streamlines your cooking process but also allows the flavors to meld beautifully, which enhances the overall taste of the galette once it’s baked.
Assembling the Galette: A Step-by-Step Guide
Layering the Ingredients: A Visual and Flavorful Strategy
Assembling your galette is both an art and a science, and it begins with layering your ingredients thoughtfully. Start by rolling out the chilled dough onto a parchment-lined baking sheet, aiming for a rough circle about 12 inches in diameter.
Tips for Spreading Onions and Layering Butternut Squash
Once your dough is ready, spread a layer of the sautéed onions evenly across the center, leaving about a 2-inch border around the edges. This area will be folded over later, so it’s important not to overcrowd it. Next, arrange the sautéed butternut squash slices in a circular pattern over the onions. To enhance the flavor, sprinkle a pinch of salt and freshly cracked pepper over the squash.
How to Evenly Distribute Goat Cheese and Parmesan for Balanced Flavor
Now, it’s time to add the cheese. Crumble the goat cheese over the squash, making sure to distribute it evenly. The tanginess of the goat cheese will beautifully complement the sweetness of the squash. For an additional layer of flavor, sprinkle some grated Parmesan cheese over the top. This not only adds a savory depth but also helps in creating a deliciously crispy crust once baked.
Folding the Edges: Creating a Rustic Presentation
With your ingredients layered, it’s time to fold the edges of the galette. This step is what gives your galette its rustic charm. Start by gently lifting the edge of the dough and folding it over the filling, creating pleats as you go along. Make sure to pinch the dough to hold it together, ensuring that the filling is encased securely.
Techniques for Pleating the Crust: Achieving a Beautiful Finish
When pleating, don’t worry about achieving perfection; the beauty of a galette lies in its charming, rustic appearance. Each pleat should be about an inch apart, allowing the filling to peek through and showcase its vibrant colors.
Importance of Egg Wash for Color and Crispiness
Before baking, brush the exposed crust with an egg wash made from one beaten egg mixed with a tablespoon of water. This will give your galette a beautiful golden color and a crispy texture once it’s out of the oven.
Baking the Galette: Achieving the Perfect Golden Crust
Understanding Baking Times and Temperatures
Preheat your oven to 400°F (200°C) before placing your assembled galette in. The ideal baking temperature is key to achieving that flaky crust you desire. Bake the galette for about 30-35 minutes, or until the crust is golden brown and the filling is bubbling.
Signs to Look for When the Galette is Perfectly Baked
Keep an eye on the galette during the last few minutes of baking. You’ll know it’s done when the crust has transformed to a deep golden hue and the edges are crisp. If the filling starts to ooze and bubble, that’s an excellent sign that it’s reached optimal doneness.
Finishing Touches: Adding Sweetness and Garnish
The Role of Honey: Balancing Flavors and Adding Depth
Once you remove the galette from the oven, let it cool for a few minutes. Drizzle a touch of honey over the top to add a pleasant sweetness that complements the savory elements. This finishing touch elevates the dish, creating a harmonious balance of flavors.
Garnishing Options: Enhancing Presentation and Flavor with Herbs
To further enhance both the flavor and presentation, consider garnishing your galette with fresh herbs such as thyme or parsley. Not only do they add a pop of color, but they also contribute a fresh, aromatic note that ties all the flavors together beautifully.
Serving Suggestions and Pairings
Optimal Serving Temperature: Warm vs. Room Temperature
When it comes to serving your golden butternut squash and goat cheese galette, the temperature can significantly impact the flavor experience. While it’s delightful served warm, it can also be enjoyed at room temperature, making it versatile for different occasions. Allow your galette to cool for about 10-15 minutes before slicing; this will help the filling set slightly, making for easier serving.
Suggestions for Side Dishes: Salads and Complementary Flavors
To create a well-rounded meal, consider pairing the galette with a fresh side salad. A simple arugula salad dressed with lemon vinaigrette can provide a peppery contrast to the sweetness of the squash. Alternatively, a roasted vegetable medley or a quinoa salad with nuts and cranberries would complement the dish nicely, adding texture and flavor diversity.
Creative Serving Ideas: Making It a Complete Meal
Pairing with Light Proteins or Hearty Salads
For a heartier meal, serve the galette alongside a light protein such as grilled chicken or fish. This combination not only enhances the nutritional profile of your meal but also rounds out the flavors beautifully.
Serving Options for Various Occasions: Appetizers, Brunch, or Light Dinners
The versatility of the golden butternut squash and goat cheese galette makes it suitable for a variety of occasions. It can serve as a stunning centerpiece for a brunch table or as a light dinner option. Cut into smaller pieces, it also makes for a delightful appetizer at gatherings, allowing guests to enjoy a bite of seasonal goodness.
Conclusion: Enjoying the Golden Butternut Squash and Goat Cheese Galette
The golden butternut squash and goat cheese galette encapsulates the warmth and richness of autumn flavors while being easy to prepare and visually stunning. Whether as a standout dish for a fall gathering or a comforting meal at home, this galette is sure to impress. With its combination of nutritious ingredients and delightful textures, it serves as an excellent way to celebrate the bounty of the season and enjoy the wholesome goodness that comes with it.
Embrace the flavors of autumn with each bite, and don’t hesitate to experiment with variations of this recipe, incorporating your favorite seasonal vegetables or cheeses. Enjoy the process of creation, and relish the satisfaction of serving a dish that not only tastes divine but also brings a touch of rustic charm to your dining experience.